Interested in DIY Water Softener Installation

Users who are viewing this thread

Thewolf56

New Member
Messages
18
Reaction score
1
Points
3
Location
Goodyear, AZ
Hello,

i am a first-time poster, but I have lurked on these threads for a while trying to gather as much information as possible.

I have never owned a water softener before, but am not unaccustomed to hard water. My old house in Phoenix had hard water (as pretty much any area in AZ does), but it took a while for hard water stains to appear and they were easily managed for the most part. I was also used to slightly hard water growing up, so the amount did not bother me. However, the house I live in now has developed major hard water stains in less than 8 months use in the faucets, toilets, sinks, etc. and I am now looking at a solution.

The only thing I have done so far regarding the water system is the installation of an undersink RO unit.

The water is city-supplied (WQA is here http://www.goodyearaz.gov/residents...nmental-quality/additional-water-quality-data).

I purchased a Hach 5B and it took 31 drops to turn blue!

The house has 3.5 baths. There are currently 3 people living here. We plan on that number increasing.

I tried using the link to the calculator that has been posted in other threads, but it does not seem to work for me.

I am looking at the Fleck 5810SXT (unless there is a better alternative), but was not sure of the size necessary.

We had the house built with a loop and and adjacent pre-plumbed utility sink in one of the garages. What struck me as odd on the loop is the 1/2" line in the middle of the loop going back into the house. Our other house did not have that in the loop, but I am thinking it is for the kitchen plumbing possibly (or less likely to the additional hose bib we had added to the back yard).

I know this is a lengthy post, but I want to thank everyone in advance. If it wasn't for many of the posters in this forum, I probably would have already bought something disposable from Costco or Sam's club.
 

Reach4

Well-Known Member
Messages
38,882
Reaction score
4,433
Points
113
Location
IL
The water is city-supplied (WQA is here http://www.goodyearaz.gov/residents...nmental-quality/additional-water-quality-data).

I purchased a Hach 5B and it took 31 drops to turn blue!
I would trust the Hach number more, although for hardness 30 to 60 grains of hardness, you usually test 50% distilled and 50% water under test. Then double the drops.

I tried using the link to the calculator that has been posted in other threads, but it does not seem to work for me.
I have Gary's calculator. For 4 people on city water with 31 hardness it says
Based on the information you entered, 7440 is your Daily Grains of Capacity needed. 59520 is the Total Grains of Capacity you need for approximately once per week regeneration with a 24 hr reserve. 3 is the minimum cubic foot size of softener required for your capacity needs.​

You should maybe get even bigger due to compensation factors.

14 x 65 would give 3.0 cu. ft. They would call this a "96000" grain size, but you would set it to a 60000 or 72000 so that you could use less total salt.

You could also consider a dual tank system.
 

ditttohead

Water systems designer, R&D
Messages
6,091
Reaction score
456
Points
83
Location
Ontario California
A simple single tank system should suffice assuming that the hardness does not go to high later.

35 GPG x 60 gallons per person per day x 4 people x 7 days = 58,800 grains. A 2.5 CF system would be adequate assuming weekly regeneration which maintains very good efficiency.
 

Thewolf56

New Member
Messages
18
Reaction score
1
Points
3
Location
Goodyear, AZ
Thank you very much for the information. I am going to retest the hardness again with the 1/2 distilled water as I recall the hardness being in the mid to high 20s using test strips in October, but I know the water source may have changed since then. I'll report back once I have retested.
 

Bannerman

Well-Known Member
Messages
4,844
Reaction score
791
Points
113
Location
Ontario, Canada
The Hach 5B is a very accurate test kit most widely used by professionals. It is generally more accurate than test strips and the accuracy range is up to 30 gpg which is why diluting your sample was recommended. As your tested hardness is only slightly over 30, I anticipate the diluted test will give similar results.

A hardness test is only a snapshot at that particular time. Hardness in a municipal supply can vary throughout the day depending on water usage and maintenance routines, so the recommended procedure is to anticipate some higher hardness by programming a few additional grains than tested into the controller. This I expect will be why Ditttohead had specified 35 gpg, not the 31 gpg you tested.
 

Tony Hwang

New Member
Messages
8
Reaction score
0
Points
1
Location
Calgary, AB
Thank you very much for the information. I am going to retest the hardness again with the 1/2 distilled water as I recall the hardness being in the mid to high 20s using test strips in October, but I know the water source may have changed since then. I'll report back once I have retested.

In my city, Calgary AB they have hardness information by the month for a year. I just took the overall average number plus 3
for my new softener. Your city may have information too. Check city web site or phone for the info. After I installed one
myself, I get it set up with helps from good folks here. Been working fine. Used ~20 lbs. of salt so far in almost two months.
 

Reach4

Well-Known Member
Messages
38,882
Reaction score
4,433
Points
113
Location
IL
Your city may have information too. Check city web site or phone for the info. After I installed one
myself, I get it set up with helps from good folks here.
thewolf56 posted his city water test in this thread. It said 13. He tested it at 31 with the reliable Hach 5-B test.

If your city did provide a range for your water, you would usually be better off using the highest number rather than the average.
 

Thewolf56

New Member
Messages
18
Reaction score
1
Points
3
Location
Goodyear, AZ
Based on the amount of hard water stains I have after just 8 months, it is without a doubt much higher than the 13 or 19 the city lists on the website. The city I just moved from listed the water hardness as 12-18, and that took a while for hard water stains to accumulate, comparatively. It was annoying to clean them up, and never noticed an issue overall, but this house's water is ridiculous.
 

Thewolf56

New Member
Messages
18
Reaction score
1
Points
3
Location
Goodyear, AZ
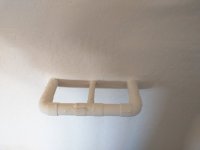
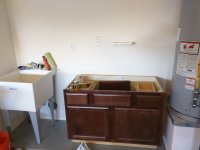
Thanks to the help I received here, I now have an 80k Fleck 5810SXT system on order, so I need to figure out how to install and program this thing. I have attached a couple of pictures of where it will go. The cabinet will be moved and that is where the water softener would go. The water main is on the right side of the house (same direction as the water heater).

My first question is, should I be cutting into the water loop on the left side or right side of that 1/2" line in the loop? I figured the easiest way would be to cut out one of the elbows in the loop, but wasn't sure which side to cut out.

My second question concerns the drain line. I want to tie into that utility sink drain, but are there any recommendations on which air gap to use? I was thinking of adding a Tee and P-trap, but still wasn't sure on which air gap to use. Found a few different options for air gaps for 1 1/2" drain pipes, but wanted to hear the best option for it. I also wanted to minimize any splashing onto the drywall.

Thanks for all of the help.

IMG_20170615_113858.jpg IMG_20170615_113836.jpg
 

Reach4

Well-Known Member
Messages
38,882
Reaction score
4,433
Points
113
Location
IL
Last edited:

Bannerman

Well-Known Member
Messages
4,844
Reaction score
791
Points
113
Location
Ontario, Canada
I figured the easiest way would be to cut out one of the elbows in the loop, but wasn't sure which side to cut out.
One side should be the incoming line from the water source, so the other should be the downstream feed to your household fixtures. In this case, you will be removing both elbows to connect the softener inlet and outlet ports.

I expect the 1/2" line will be to feed external spigots used for grass irrigation which will not normally need softened water. You could consider installing 3 valves to control flow to that 1/2" line so as to occasionally provide softened water to that line for washing vehicles or other uses where you may sometimes want softened water.
 

ditttohead

Water systems designer, R&D
Messages
6,091
Reaction score
456
Points
83
Location
Ontario California
The middle one could also be a kitchen sink cold water bypass, or if the builder is really old school it could be a toilet bypass. This is a bit tricky as you will need to determine what it is. Do you have a neighbor who has a system installed that you can check to see what it feeds?

For the drain, can you simply run 3/4" PVC secured to the wall and then over the sink? You need to keep a gap but this will eliminate the need for the p-trap, etc.
 

Thewolf56

New Member
Messages
18
Reaction score
1
Points
3
Location
Goodyear, AZ
Hi Guys,

I ended up having to do quite a bit of traveling for work over the past few weeks, and I'm kind of disappointed my 5810SXT has been sitting in my garage for almost 3 weeks without being hooked up.

First, I wanted to thank everyone again for all of the help that has been supplied.

I had seen the mister gap before, but a lot of the reviews had mentioned splashing and the like on it, so wanted to know if anyone had any experience with it. I wondered if it would be better to adapt the 1 1/2" drain to 2" so it could be dropped into a coupling and that would minimize splash. Plumbing the drain with PVC would not be a problem either ( I would just need to know how much space I would need between the bottom of the sink and the end of the drain line for an adequate gap), but I may have stumbled across another solution that I'll address at the end of the post.

While thinking about how the loop was plumbed, I started looking through some of the pictures I took during the pre-drywall inspection of the house. I found some pictures of it, and I think I got a good enough picture to see how it is plumbed.

The first picture is where the water enters the house from the outside. As soon as it enters the wall, it branches off. I believe this is to feed the 2 hose bibs I had installed in the back of the house.

P6085687.JPG


Here is a picture of the loop pre-drywall.

P6085692.JPG


This picture is a view of the plumbing above the loop. On the full-size image on my computer, I can zoom in enough to see that the left side of the loop tees off to the supply side of the water heater and the right side curves towards the water main shut-off. So I have now figured out the supply side and return side of the loop.

P6085693.JPG


I still wanted to figure out the 1/2" line, so I came across a picture in my folder from when my wife and I checked out the progress. I noticed in the picture of the laundry hookup that there is a 2nd cold water line into the fixture (the hot water PEX had not been installed at this point) and it stops right above the drain for the washer. I went to go double-check the washer hookup now, and that line is capped and looks like it would act as a drain line for something.

IMG_20160507_144815.jpg


IMG_20170715_190927.jpg


Is the 1/2" line plumbed for the water softener at the loop? My laundry room is on the 2nd story, but everything I read said that the height of the line would not be an issue. I guess I could just play it safe and plumb the 1/2" line to be soft water, but I know that not everyone has a garage sink installed to drain easily. I'm still hoping to chat with one of my neighbors that I know has a water conditioning system installed, but they've been travelling a lot also.

Thanks again for everyone's help. I have definitely learned a lot here and hope to have this project wrapped up soon.
 

Reach4

Well-Known Member
Messages
38,882
Reaction score
4,433
Points
113
Location
IL
Is the 1/2" line plumbed for the water softener at the loop?
Based on where it comes out at the washer box, I suspected it was intended for the softener drain line.

I now find http://www.ipscorp.com/plumbing/watertite/supplyvalve/washingmachine/widemouth appears to be your washing machine box. It seems to be made for the purpose of handling the softener drain discharge. Good deal!
wmob_wide_mouth.jpg


The drain line connection comes out of the right side of the 5810 controller, and the brine line connection is on the left.
 
Last edited:

ditttohead

Water systems designer, R&D
Messages
6,091
Reaction score
456
Points
83
Location
Ontario California
That is very typical for new home builders. They usually do it in hopes of upselling you their softener at a ridiculous price, and the installation is extremely simple for them.
 

Reach4

Well-Known Member
Messages
38,882
Reaction score
4,433
Points
113
Location
IL
That is very typical for new home builders. They usually do it in hopes of upselling you their softener at a ridiculous price, and the installation is extremely simple for them.
That is going to make it very simple for thewolf56 too. Nice drain line solution IMO.
 

Thewolf56

New Member
Messages
18
Reaction score
1
Points
3
Location
Goodyear, AZ
Thank you very much for all of the help. As it turns out, I ran into my neighbor outside (it is a rare occurrence in the Arizona Summer) and the drain line of the softener was indeed hooked up to that 1/2" line that is connected to the loop. The tough part will be removing the cap in the laundry room. It is soldered on and I don't know if there is enough room for my small tubing cutter to rotate fully around.

The other nice thing about checking out his setup is that his installer tied in a hose bib to the loop on the soft water side. I think I might do that for when I wash my cars.

I plan on doing the install this weekend, so I may need some programming help with reserve capacity and the like.
 

Thewolf56

New Member
Messages
18
Reaction score
1
Points
3
Location
Goodyear, AZ
Just a follow-up. I don't think I would have been able to do this without the help I received here, so thank you to everyone.

I installed the water softener earlier today. It was the first time I've sweated copper in 13 years. First joints I sweated weren't pretty, but should hold fine long term. Later joints looked just like I used to make them, but I was definitely not nearly as efficient as I used to be. I ended up using PEX to complete the drain connection. The other end was more difficult. I was originally going to try to desweat the cap in the laundry room, but there was just too much plastic to do so safely even with a heat shield. Tried using a mini hacksaw, but there was too much twist, so ended up blocking the stub to the best as I can and used a sawzall to cut through the cap. Once the air was purged from the drain line, the flow looked good with no splatter.

Started up the softener according to the service manual and all looked good. I setup the user programming for 31 hardness, 225 gallon reserve, and 21 day override. I added three bags of pellets to the brine tank and started the manual regeneration. By the time everything was finished, the water level was much higher than the water. I added 2 more bags and the water level was still higher (I had only purchased 5 bags to start).

Is that normal? I know it is a large brine tank and system, but I didn't realize how much salt would be needed at startup.

Here is a picture of the final setup. I still need a vacuum breaker for the hose bib, but can't think of anything else I need to do here.

IMG_20170722_230115.jpg


Additionally, I just tested the water out of the garage sink (figured it would have the shortest distance and least amount of water to cycle out) and the water was purple as soon as I added the reagent. One drop and the water was blue. I take it that I now have soft water.

Edited to add Hach 5B test information.
 
Last edited:

Bannerman

Well-Known Member
Messages
4,844
Reaction score
791
Points
113
Location
Ontario, Canada
Settings are not typically pre-programmed for your specific requirements.

You may wish to post your settings for review. Include also the BLFC number which is typically indicated on a label located near the brine connection on the valve. We can then make recommendations to ensure the most efficient configuration.

Is that outlet protected by a GFCI, especially as the hose bib is located so close?
 
Top
Hey, wait a minute.

This is awkward, but...

It looks like you're using an ad blocker. We get it, but (1) terrylove.com can't live without ads, and (2) ad blockers can cause issues with videos and comments. If you'd like to support the site, please allow ads.

If any particular ad is your REASON for blocking ads, please let us know. We might be able to do something about it. Thanks.
I've Disabled AdBlock    No Thanks