New install -- need winterizing advice

Users who are viewing this thread

Joseph Skoler

Member
Messages
274
Reaction score
12
Points
18
Location
Sullivan County, NY
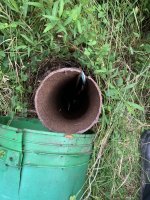
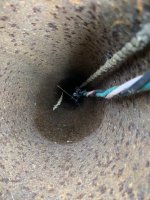
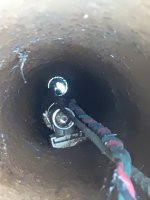
I just installed did the install shown on the attached pic (nope, not a pro at all) -- had extremely little space available.

The well line comes in on the left, goes through a check valve (with schrader port on it, which I believe allows air in so the water can drain back down into the well -- right?), then into the CSV and pressure tank with well pump pressure switch, then through filter, then into a multiport tee (house cold water, water heater, hose spigot.

What I forgot to plan for is being able to drain the system for winterizing (or if power goes out for an extended period during freezing temp).

I'd sure appreciate some advice on the best way to make this reliably drainable (and anything else that is not correct).

Thank you,

Joe

IMG_0993.jpg
 

Valveman

Cary Austin
Staff member
Messages
14,633
Reaction score
1,304
Points
113
Location
Lubbock, Texas
Website
cyclestopvalves.com
Nice looking install of the PK1A! You don't really want a check valve anywhere above ground. The one on the pump is all you need. The extra check valve can cause water hammer on pump start.

An easy way to drain a system is to use a brass bleeder orifice down the well below the frost level.

Brass bleeder orifice.jpg


You will also need to remove the above ground check valve to make the bleeder work as a drain back system. As long as there is no check valve after the bleeder, the pressure in the system will keep the little ball pressed against the hole, and no water will come out. When you get ready to drain the system to leave, just turn off the power to the pump and open a faucet at the house. When the pressure tank is empty and the pressure drops to zero, the ball in the bleeder will drop and let the system drain all the way from the open faucet down to the bleeder orifice.

On returning, just turn on the pump, wait for the air to get out and water to start coming out the still open faucet. Close the faucet and you are back in water as normal.
 

WorthFlorida

Clinical Trail 5th session completed 4/24/24.
Messages
5,763
Solutions
1
Reaction score
998
Points
113
Location
Orlando, Florida
By removing the water filter housing, would that help in draining the system? What about an outside spigot?

The heater exhaust looks like it is going downhill, not uphill. Check the installation manual. If condensation ever forms in the exhaust it may not have away to drain out. If the exhaust is straight out the side wall of the home, it's probably be OK, but if it goes up through the roof, the condensate will have nowhere to go. Right at the wall I see the small tube of some kind. Could that be for a condensate line?
 

Joseph Skoler

Member
Messages
274
Reaction score
12
Points
18
Location
Sullivan County, NY
Nice looking install of the PK1A! You don't really want a check valve anywhere above ground. The one on the pump is all you need. The extra check valve can cause water hammer on pump start.

An easy way to drain a system is to use a brass bleeder orifice down the well below the frost level.

View attachment 75221

You will also need to remove the above ground check valve to make the bleeder work as a drain back system. As long as there is no check valve after the bleeder, the pressure in the system will keep the little ball pressed against the hole, and no water will come out. When you get ready to drain the system to leave, just turn off the power to the pump and open a faucet at the house. When the pressure tank is empty and the pressure drops to zero, the ball in the bleeder will drop and let the system drain all the way from the open faucet down to the bleeder orifice.

On returning, just turn on the pump, wait for the air to get out and water to start coming out the still open faucet. Close the faucet and you are back in water as normal.

Hi Cary,

I love your PK1A's -- have them in several places.

I just got the current place so I don't know the details of the well pump. I know where the head is, but that's about it. I don't know, for example, if there is a foot valve or what kind/size of pump, etc. What I do know if that the original setup had this very check valve (that why I put it back in the system) and it was inside the house (there was a large pressure tank after it).

I also have no clue where the bleeder orifice would go -- I have no access to below frost level. The well head sits at ground level.

Is there an alternate solution?

Thank you,

Joe
 

Joseph Skoler

Member
Messages
274
Reaction score
12
Points
18
Location
Sullivan County, NY
By removing the water filter housing, would that help in draining the system? What about an outside spigot?

The heater exhaust looks like it is going downhill, not uphill. Check the installation manual. If condensation ever forms in the exhaust it may not have away to drain out. If the exhaust is straight out the side wall of the home, it's probably be OK, but if it goes up through the roof, the condensate will have nowhere to go. Right at the wall I see the small tube of some kind. Could that be for a condensate line?

I thought about removing the filter housing, but I am concerned that the pressure tank would still have some water in it, as well as the water lines through the house and back out to the well.

The wall that the heater exhaust pipe enters on the right is an exterior wall and the vent is right on the other side of that wall.

Thank you!
 

Valveman

Cary Austin
Staff member
Messages
14,633
Reaction score
1,304
Points
113
Location
Lubbock, Texas
Website
cyclestopvalves.com
I know most houses have an extra check valve before the pressure tank. I spend about 3 hours everyday explaining to people their water hammer problems will go away after they remove that check valve. In some states it is illegal, others it is mandatory. There are lots of people who will argue more than one check valve is needed. But from my experience anymore than one check is just a problem waiting to happen. If you leave the check valve in that place, the bleeder will cause it to draw in air at the Schrader, which is how it works to charge a regular hydro non-bladder tank. That air would blow right on through a bladder/diaphragm tank and blow a glass out of your hand at the sink. Without the check valve a bleeder only works when you turn off the pump and drain the tank to zero pressure.

The bleeder really needs to go in the well. But you could put it in the underground line from the well tot he tank in a French drain. How else or where else can you drain the system down to 5' or so below surface, which I am guessing is the freeze depth in your area?
 

Reach4

Well-Known Member
Messages
38,903
Reaction score
4,439
Points
113
Location
IL
The well line comes in on the left, goes through a check valve (with schrader port on it, which I believe allows air in so the water can drain back down into the well -- right?),
Bleeding would require a bleeder orifice in the well.

This setup is worrisome to me in that it may add air during normal operations. To minimize air, put a tire valve cap on the Schrader valve, rather than the vented cap used in Snifter operation.

Or here is an idea: instead of a bleeder in the well have a tee in the well to another pipe that can be opened or closed with a valve. Then if that valve get opened, you could clear the water with compressed air. This could let you be rid of the check valve.

Here is another idea: instead of an elbow atop the well seal, put a tee. When it's time to remove water, run a tube through the tee, through the downpipe and either suck or blow through that tube. This could also let you be rid of the check valve.
 

Valveman

Cary Austin
Staff member
Messages
14,633
Reaction score
1,304
Points
113
Location
Lubbock, Texas
Website
cyclestopvalves.com
I am sure he has a pitless adapter and drawing water from the top would be impossible. You won't get any air with a bleeder down the well as long as you don't have a check valve above ground. The check valve needs to go anyway.
 

Reach4

Well-Known Member
Messages
38,903
Reaction score
4,439
Points
113
Location
IL
I am sure he has a pitless adapter and drawing water from the top would be impossible. You won't get any air with a bleeder down the well as long as you don't have a check valve above ground. The check valve needs to go anyway.
If he has a pitless, that changes things. But maybe there is a way to intercept the path from the pitless to the house.

Or just lift the pitless 2 or 3 inches during shutdown procedure. Maybe even 1 inch would be enough to break the seal, and the pitless trapezoid could stay captured. The water drains out there back into the well. Then set the pitless back in place.
 

Joseph Skoler

Member
Messages
274
Reaction score
12
Points
18
Location
Sullivan County, NY
Does this help:
 

Attachments

  • IMG_1018.JPEG
    IMG_1018.JPEG
    172.2 KB · Views: 128
  • IMG_1019.JPEG
    IMG_1019.JPEG
    108.6 KB · Views: 133
  • IMG_1020.JPEG
    IMG_1020.JPEG
    199.7 KB · Views: 129
  • IMG_1023.JPEG
    IMG_1023.JPEG
    63.4 KB · Views: 127

Reach4

Well-Known Member
Messages
38,903
Reaction score
4,439
Points
113
Location
IL
Yes. You have a trapezoidal sliding pitless adapter. To drain the pipe into the house, I think you could lift the pitless a bit. It probably has a 1 inch NPT thread up top, and you would use a pipe, with a T-handle, to lift the pitless with a jack..

Normally with a pitless, you use a well cap. The well cap has a part that sits around the casing and has a conduit/pipe that carries the wire up from underground. That conduit protects the wire from impacts/damage.

You have your wires unprotected and passing through a notch. You should at least somehow pad the notch to avoid abrading into the wire insulation.

Your pitless supports the polyethylene drop pipe. Normally there would be two or 3 worm gear clamps holding the poly pipe to the barb under the pitless. Usually you would want a long barb there that would work with 3 clamps.

If you show the place that the well pipe comes through the basement wall, we might have some more thoughts.
 

Valveman

Cary Austin
Staff member
Messages
14,633
Reaction score
1,304
Points
113
Location
Lubbock, Texas
Website
cyclestopvalves.com
You need a proper pitless well cap. That bucket won't help when the kids decide to see how it sounds when they drop rocks, sticks, dog turds, or who knows what down there.

I would not want to lift it off the pitless every year. The o-ring seal will be compromised. But I would lift it once, install a tee with a bleeder orifice, and set it back down.
 

Joseph Skoler

Member
Messages
274
Reaction score
12
Points
18
Location
Sullivan County, NY
Yes. You have a trapezoidal sliding pitless adapter. To drain the pipe into the house, I think you could lift the pitless a bit. It probably has a 1 inch NPT thread up top, and you would use a pipe, with a T-handle, to lift the pitless with a jack..

Normally with a pitless, you use a well cap. The well cap has a part that sits around the casing and has a conduit/pipe that carries the wire up from underground. That conduit protects the wire from impacts/damage.

You have your wires unprotected and passing through a notch. You should at least somehow pad the notch to avoid abrading into the wire insulation.

Your pitless supports the polyethylene drop pipe. Normally there would be two or 3 worm gear clamps holding the poly pipe to the barb under the pitless. Usually you would want a long barb there that would work with 3 clamps.

If you show the place that the well pipe comes through the basement wall, we might have some more thoughts.

I don't know what any of that means, but at least now I have a starting point to research and learn -- thank you.

I'll ask my local supply house if they have a well cap with with pipe to attach to top of pitless adapter with "T" handle.

As for lifting the pipe, I'm reluctant to do so out of fear of messing it up.

Looks like the whole thing is held up with rope.
 

Joseph Skoler

Member
Messages
274
Reaction score
12
Points
18
Location
Sullivan County, NY
You need a proper pitless well cap. That bucket won't help when the kids decide to see how it sounds when they drop rocks, sticks, dog turds, or who knows what down there.

I would not want to lift it off the pitless every year. The o-ring seal will be compromised. But I would lift it once, install a tee with a bleeder orifice, and set it back down.

I'll try to get a cap.

I don't know what "lift it off the pitless" means, but I'll be researching it.
 

Reach4

Well-Known Member
Messages
38,903
Reaction score
4,439
Points
113
Location
IL
Try searching for "well cap" in Google, with the quotes.

I suspect your casing is 5 inch ID and 5.5 OD. But you should measure.

Looks like the whole thing is held up with rope.
Probably not. That is probably a "safety rope". Usually that rope is a bad idea, because what if that somehow gets cut and falls down the well? It could jam things up, preventing pulling the pump.

How about a photo from the basement where the pipe from the well comes through the wall.
 

Joseph Skoler

Member
Messages
274
Reaction score
12
Points
18
Location
Sullivan County, NY
Try searching for "well cap" in Google, with the quotes.

I suspect your casing is 5 inch ID and 5.5 OD. But you should measure.


Probably not. That is probably a "safety rope". Usually that rope is a bad idea, because what if that somehow gets cut and falls down the well? It could jam things up, preventing pulling the pump.

How about a photo from the basement where the pipe from the well comes through the wall.

I've been researching....

It looks like there is no lifting pipe screwed in to the top of the pitless adapter. Should there be a permanent lifting pipe screwed in?

There is no basement. The well pipe goes goes under ground and then up through the floor of the room in my picture, through a several inch thick concrete slab. It's a PE pipe that changes to Uponor Pex a few inches above where it exits the concrete.
 

Reach4

Well-Known Member
Messages
38,903
Reaction score
4,439
Points
113
Location
IL
It looks like there is no lifting pipe screwed in to the top of the pitless adapter. Should there be a permanent lifting pipe screwed in?
No.

It is screwed in when you want to lift, and unscrewed and stored when you are done with the well work.

It can be built out of galvanized or black pipe. I see it can be bought pre-made. https://www.completeplumbingsource.com/well-pump-pulling-tee

The T shape at the top prevents the device from falling down the well, and provides a handle or lash point.
 

Joseph Skoler

Member
Messages
274
Reaction score
12
Points
18
Location
Sullivan County, NY
No.

It is screwed in when you want to lift, and unscrewed and stored when you are done with the well work.

It can be built out of galvanized or black pipe. I see it can be bought pre-made. https://www.completeplumbingsource.com/well-pump-pulling-tee

The T shape at the top prevents the device from falling down the well, and provides a handle or lash point.

Oh, so a 1" galvanized pipe with a tee at the top and side pieces coming out of the tee and I have all I need to lift the well (well, that and something with enough lifting power -- can I use the bucket of a 100hp tractor to lift it?)?

As far as check valve with relief, why would it matter if the check valve were at the well head or 50' further along on the pipe as it enters the house?

Thanks!
 

Reach4

Well-Known Member
Messages
38,903
Reaction score
4,439
Points
113
Location
IL
There is no basement. The well pipe goes goes under ground and then up through the floor of the room in my picture, through a several inch thick concrete slab. It's a PE pipe that changes to Uponor Pex a few inches above where it exits the concrete.
Show a picture of that.

I am not a pro. Here are some ideas that come to mind. These ideas have not been tested:

Plan 1. I am thinking you could replace the pex adapter with a tee with a side port (drain valve or plug). Put the pex adapter into the top of the tee. Then to winterize, drain the pipe above with the drain port. Then stack XPS insulation above and around for many feet. Allow the heat from underground to keep the poly and tee warm enough. Have the path around the insulation to be long enough to not let the heat escape around the insulation. It is critical

Plan 2: Put a brass tee at the top of the tee. Feed the PEX out of the side of the tee. The top of the tee is plugged with a brass plug or a full-port ball valve. To winterize, turn off the pump. Open the plug/valve, and suck up the water that drains from the piping with a wet-dry vacuum. Stick a suction tube down into the poly far enough. Suck out the water.

(well, that and something with enough lifting power -- can I use the bucket of a 100hp tractor to lift it?)?
Yes, but if you are only going a few inches, then a hydraulic jack would give more control. If the bucket can lift the pitless above the casing, you could inspect the o-ring, replace if needed, lube the o-ring with Molykote 111 or other suitable NSF-listed silicone grease, and put the pitless back in its socket.

Wearing out the o-ring is a good consideration. Valveman is a pro.

Can you lift high enough?

Those methods I described to clear the water would avoid annually lifting the pitless.
 

Joseph Skoler

Member
Messages
274
Reaction score
12
Points
18
Location
Sullivan County, NY
Show a picture of that.

I am not a pro. Here are some ideas that come to mind. These ideas have not been tested:

Plan 1. I am thinking you could replace the pex adapter with a tee with a side port (drain valve or plug). Put the pex adapter into the top of the tee. Then to winterize, drain the pipe above with the drain port. Then stack XPS insulation above and around for many feet. Allow the heat from underground to keep the poly and tee warm enough. Have the path around the insulation to be long enough to not let the heat escape around the insulation. It is critical

Plan 2: Put a brass tee at the top of the tee. Feed the PEX out of the side of the tee. The top of the tee is plugged with a brass plug or a full-port ball valve. To winterize, turn off the pump. Open the plug/valve, and suck up the water that drains from the piping with a wet-dry vacuum. Stick a suction tube down into the poly far enough. Suck out the water.

Yes, but if you are only going a few inches, then a hydraulic jack would give more control. If the bucket can lift the pitless above the casing, you could inspect the o-ring, replace if needed, lube the o-ring with Molykote 111 or other suitable NSF-listed silicone grease, and put the pitless back in its socket.

Wearing out the o-ring is a good consideration. Valveman is a pro.

Can you lift high enough?

Those methods I described to clear the water would avoid annually lifting the pitless.

Plan 1: If you mean replace the PE to pex adapter at several inches above the concrete then unfortunately for me I didn't ask you 2 weeks ago when I laid 6" of XPS over the concrete floor and laid plywood and a floor on top of that to both insulate the piping and bring the floor to the same level as the rest of the house. I know, I know -- if ever there's a problem at the adapter-elbow....

Is is reasonable to assume that the check valve will actually allow the water to fall back down into the well (utilizing the schrader air valve)?

If so, and if I don't have a water hammer problem, then removing the filter case would seem to drain everything except the pressure tank, right?
 
Top
Hey, wait a minute.

This is awkward, but...

It looks like you're using an ad blocker. We get it, but (1) terrylove.com can't live without ads, and (2) ad blockers can cause issues with videos and comments. If you'd like to support the site, please allow ads.

If any particular ad is your REASON for blocking ads, please let us know. We might be able to do something about it. Thanks.
I've Disabled AdBlock    No Thanks