Best way to remove shower pan drain?

Users who are viewing this thread

Tim Moyer

Member
Messages
64
Reaction score
6
Points
8
Location
NJ
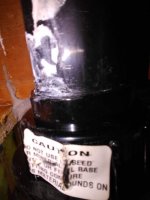
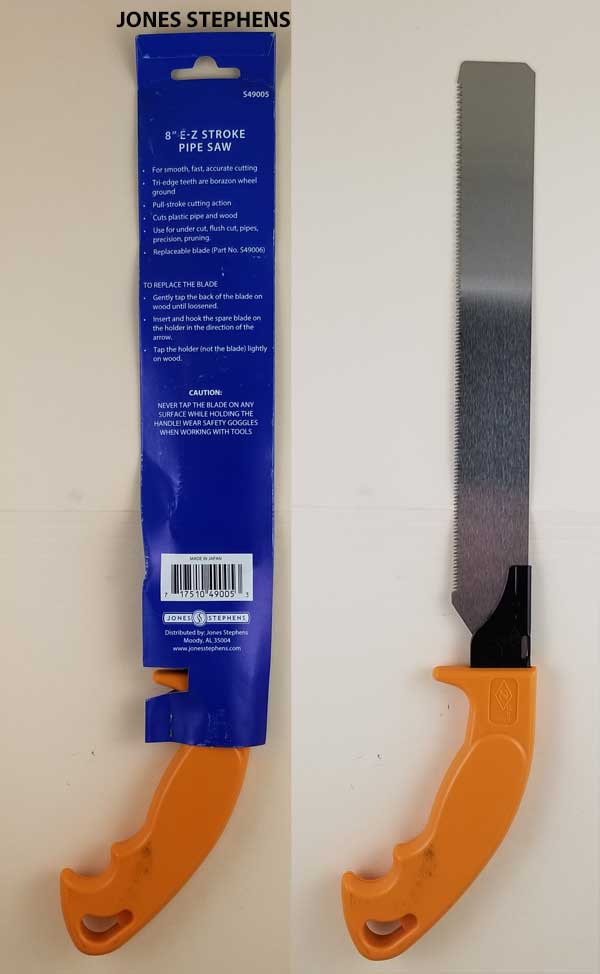
I have a drain in my Sterling 3-piece caulkless shower pan that I'd like to remove as part of a planned shower remodel. There are two notches below the plastic part at the top where the screw holes are located. I don't believe the Oatley tool would work in this instance. There isn't any rubber gasket that I can drill or pull out. I may have had a razor blade looking thing at one time that had a slot for a screwdriver to install it, but it has long disappeared. Is this what I need to find? If so, where can it be purchased? If not, any suggestions short of using a reciprocating saw around the drain and getting to the nut below after the pan is removed? I do not have access from below.
Thank you!

drain.jpg
 

Terry

The Plumbing Wizard
Staff member
Messages
29,942
Reaction score
3,459
Points
113
Location
Bothell, Washington
Website
terrylove.com
If you mean the ring that threads in that holds a rubber seal, that can be removed to unthreading, by pushing it with flat blade screwdriver if you don't have the supplied tool.

oatey_no_calk_drains.jpg


Are you reusing the shower base? If not, we sometime cut around it.
 

Tim Moyer

Member
Messages
64
Reaction score
6
Points
8
Location
NJ
No, I'm going to replace everything with Schluter. I'll try the screwdriver method first. Thanks for your quick reply.
 
Last edited:

Tim Moyer

Member
Messages
64
Reaction score
6
Points
8
Location
NJ
OK, so we got the drain out by unscrewing it using a prybar and screwdriver (with a little help from silicone spray). Now we are left with the piece the drain was screwed into (see photos). It looks like this piece as a collar around the ABS that leads to the trap. We are not sure if this is meant to unscrew as well or if it is glued to the ABS pipe that leads to the trap and needs to be cut out. There is also a label on the collar which we can't fully make out, but you pros may know what is says. Kindly advise before we go further today with the project.

IMG_20210712_113237423.jpg
IMG_20210712_114048834.jpg
 

Attachments

  • IMG_20210712_112545397 (1).jpg
    IMG_20210712_112545397 (1).jpg
    53.6 KB · Views: 180

wwhitney

In the Trades
Messages
6,567
Reaction score
1,847
Points
113
Location
Berkeley, CA
Zero experience with that product, but to me it appears glued on.

But even if it unscrews, I believe your Kerdi drain glues on. In which case you won't be able to make use of any of the existing height beyond the top of the visible pipe before it enters existing drain body. That means if you cut it below the hub of the drain body, you've lost nothing. If there are threads in there you'd have to cut them off anyway.

Cheers, Wayne
 

Terry

The Plumbing Wizard
Staff member
Messages
29,942
Reaction score
3,459
Points
113
Location
Bothell, Washington
Website
terrylove.com
You need a new drain there, so you can go ahead and cut that one out.
Either a coupling for that, or replace the p-trap too if that's easier.

jones-stephens-hand-saw.jpg


They have these at Fergusons.
 
Last edited:

Tim Moyer

Member
Messages
64
Reaction score
6
Points
8
Location
NJ
Stupid question, but what would be the best way to get a flush cut below the old flange: reciprocating saw (I have room to get one level), multi-tool, inside pipe cutter or coping saw? I'm just trying to make sure I have the best cut for the Schluter flange or if needed a union before adding the right amount of riser pipe.
 

wwhitney

In the Trades
Messages
6,567
Reaction score
1,847
Points
113
Location
Berkeley, CA
Best way is whatever gets you a square cut that isn't so rough that you have spend a long time deburring it.

As an occasional plumber, I find a reciprocating saw to be very fast, often a bit too aggressive, so it requires some skill and close attention to stay square. [I've been using a metal cutting blade on the assumption that the fine teeth would be less aggressive.] An oscillating saw works, it's slower, which makes it easier to stay on target, but the blade seems to dull easily giving a half melty cut on ABS that needs a fair amount of cleaning up by hand. I haven't tried an inside cutter, but if you had a way to register it off the square (to the pipe) flange of the shower drain, that should give you a very square cut. A hand saw could work nicely but will be a fair amount of effort for ABS.

Cheers, Wayne
 

Tuttles Revenge

In the Trades
Messages
4,205
Reaction score
1,459
Points
113
I used those drains once for a project in the 90s for a specific reason that I could screw the top on after setting the shower. Had I known about No Caulk shower drains then I wouldn't have ever used those.

Sounds like you're installing a Schluter drain which I believe is a type of No Caulk drain. It would be helpful if you could provide a link to the actual drain that will be used to know how to proceed.
 

Tim Moyer

Member
Messages
64
Reaction score
6
Points
8
Location
NJ
I used those drains once for a project in the 90s for a specific reason that I could screw the top on after setting the shower. Had I known about No Caulk shower drains then I wouldn't have ever used those.

Sounds like you're installing a Schluter drain which I believe is a type of No Caulk drain. It would be helpful if you could provide a link to the actual drain that will be used to know how to proceed.
Sure, here is a link to what I purchased.
 

Tuttles Revenge

In the Trades
Messages
4,205
Reaction score
1,459
Points
113
Here is the installation instructions for the drain itself

https://www.schluter.com/schluter-us/en_US/Shower-System/Drains/Schluter®-KERDI-DRAIN/p/KERDI_DRAIN

It appears that you need to glue the drain to the vertical standpipe at the height of the bottom of your shower. So first you need to determine whether when you cut that old drain body off if the height of the pipe allows you to glue the drain body on directly or if its too short, you should cut the standpipe off low enough so that you can add a coupling and a new section of pipe cut to the height that allows your drain to be at the correct height per the instructions.
 

Jeff H Young

In the Trades
Messages
8,962
Reaction score
2,236
Points
113
Location
92346
plenty of room cut off with whatever you got, no big deal if you need to trim a bit more on one side if cuts outa square a bit dressing it off and deburring is pretty easy with plastic. Its pretty normal to cut the trap off and redo that to make everything centered as fiberglass showers are notorious for not having drain in exact center, so if you don't recenter trap it looks horrible. no big deal its just plastic
 

Tim Moyer

Member
Messages
64
Reaction score
6
Points
8
Location
NJ
Thanks everyone. I purchased an extra union an some extra 2" ABS pipe just in case.
 

Tuttles Revenge

In the Trades
Messages
4,205
Reaction score
1,459
Points
113
How I like to do these is to cut the stand pipe and install the coupling Only on the trap side. Then glue a piece that is several inches Too long into the shower body. Dry fit the assembly into the coupling and measure the distance from the bottom of the flange to the floor and cut that difference off the assembly.

Its easier to remove 2" from a plastic pipe than it is to remove 1/4"
 

Tim Moyer

Member
Messages
64
Reaction score
6
Points
8
Location
NJ
So we were successful in cutting down the correct height of the riser pipe by using an internal pipe cutter, door jam saw and a multi-tool to make the last little shavings to make it level (4" level came in handy). We had to use the multi-tool to shave a little off the top of a floor joist because the Schluter flange was hitting the edge. The multi-tool is now my favorite tool in my collection. I have used it for more applications in this project than any other tool.
We used the Styrofoam spacers that came with the Schluter flange to dry fit everything before we glue it together and checked it with a 9" level. Pretty neat system they (Schluter) have.
Thanks for everyone's help in being successful with this stage of the project!
 
Top
Hey, wait a minute.

This is awkward, but...

It looks like you're using an ad blocker. We get it, but (1) terrylove.com can't live without ads, and (2) ad blockers can cause issues with videos and comments. If you'd like to support the site, please allow ads.

If any particular ad is your REASON for blocking ads, please let us know. We might be able to do something about it. Thanks.
I've Disabled AdBlock    No Thanks