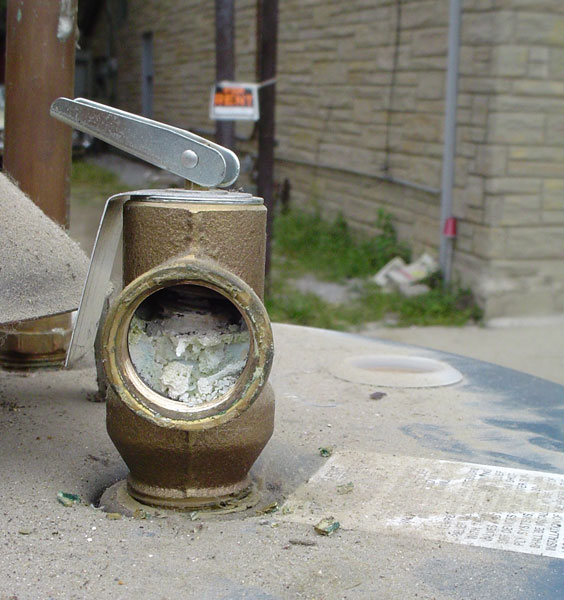
Here is a link to an archived Terrlove Forum thread that describes tanks that suffered from vacuum implosion. One of the first tell-tale signs are the crooked supply nipples (top or side supplied) and once the jacket is removed more damage can typically be seen, not that many people go through the trouble of removing it. The next time I come across one I'll get a photo, but until then check out the link.
https://terrylove.com/forums/archive/index.php/t-10664.html
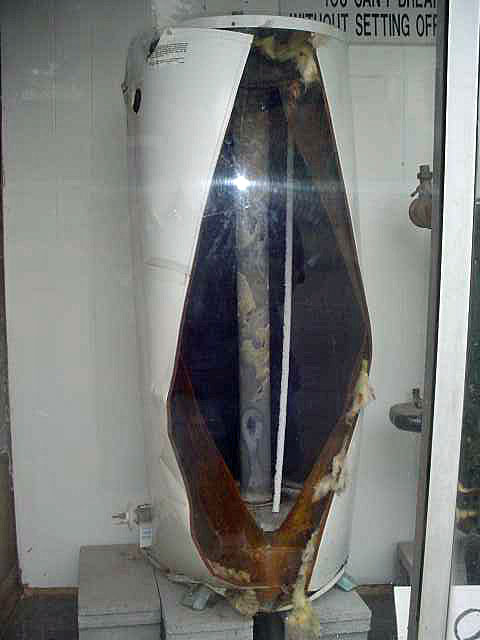
The first descriptions in the thread of a damaged tank are usually caused by draining the tank with the supply valve off and no faucet(s) opened to relieve the vacuum. If the drain is then closed, the remaining moist air in the tank will cool and have an even more dramatic imploding action. That's why opening a valve during draining is important. The same scenario can happen if a faucet or other fixture is opened and there is a loss of positive pressure (cold water feed) on the system. This is more common with side supplied tanks, but not exclusive to them.
Fill a plastic water bottle with very hot tap water. Empty the bottle and put the cap back on tightly and set it aside to cool. It won't take long for the bottle to crumple in on itself. Modern vacuum relief valves are also more reliable than older designs and I have yet to see one leak, but periodic testing when you flush your tank should indicate if it's having operational or leaking issues.
Turn off power or gas to the hot water tank. Leave all faucets and fixture valves closed then close the cold supply valve to the water heater. Connect a hose to the drain of the tank to discharge the hot water somewhere safe from scalding. Open drain at the bottom of the tank. You should see the held pressure relieve from the tank quickly and then the tank will start draining by gravity. That's when you should hear the 'ssssssss' of the vacuum relief valve if it's working correctly. If you don't hear it hissing, open a faucet for hot water to relieve the vacuum and start filling your tank, close the boiler drain, continue purging the air from the tank and pipes and reset the tank for normal operation until you can replace the VRV.
Added Master Plumbers Picture