Can I use sharkbites to replace a shower valve?

Users who are viewing this thread

Tireshark

Member
Messages
72
Reaction score
2
Points
8
Location
Arkansas
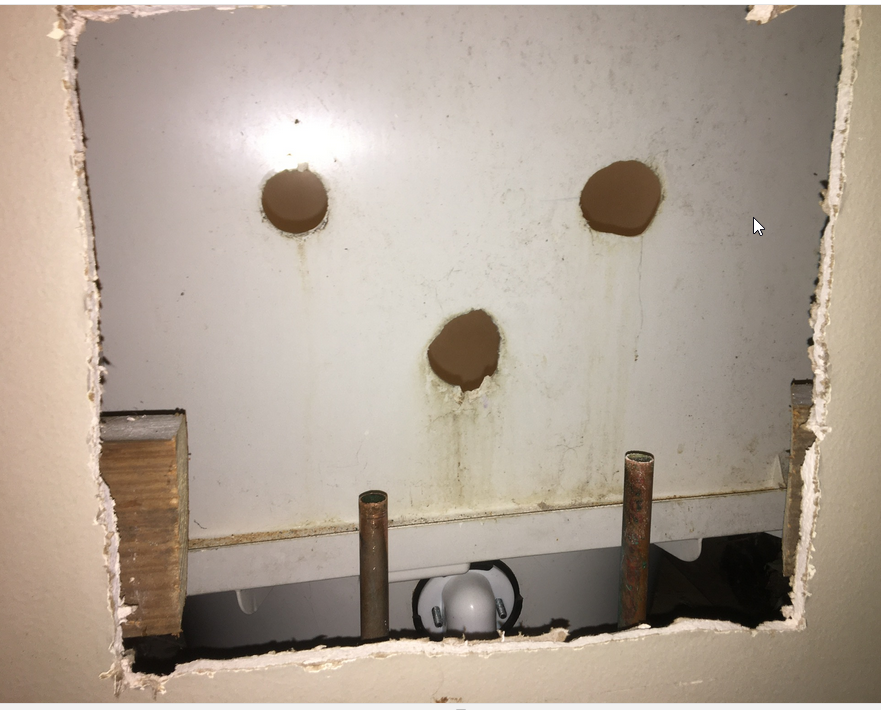
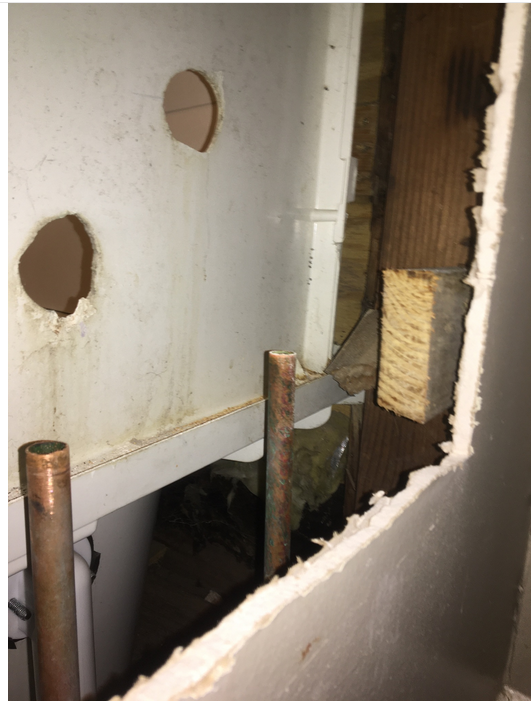
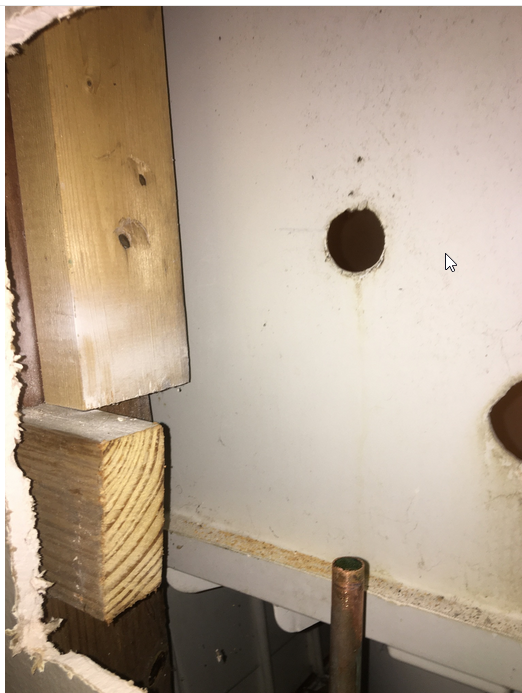
This is a rental built in the 60's. I'm having a guy do some joist work and put in a new floor, and I decided to get a new vanity and address the old shower/toilet pipes at the same time.

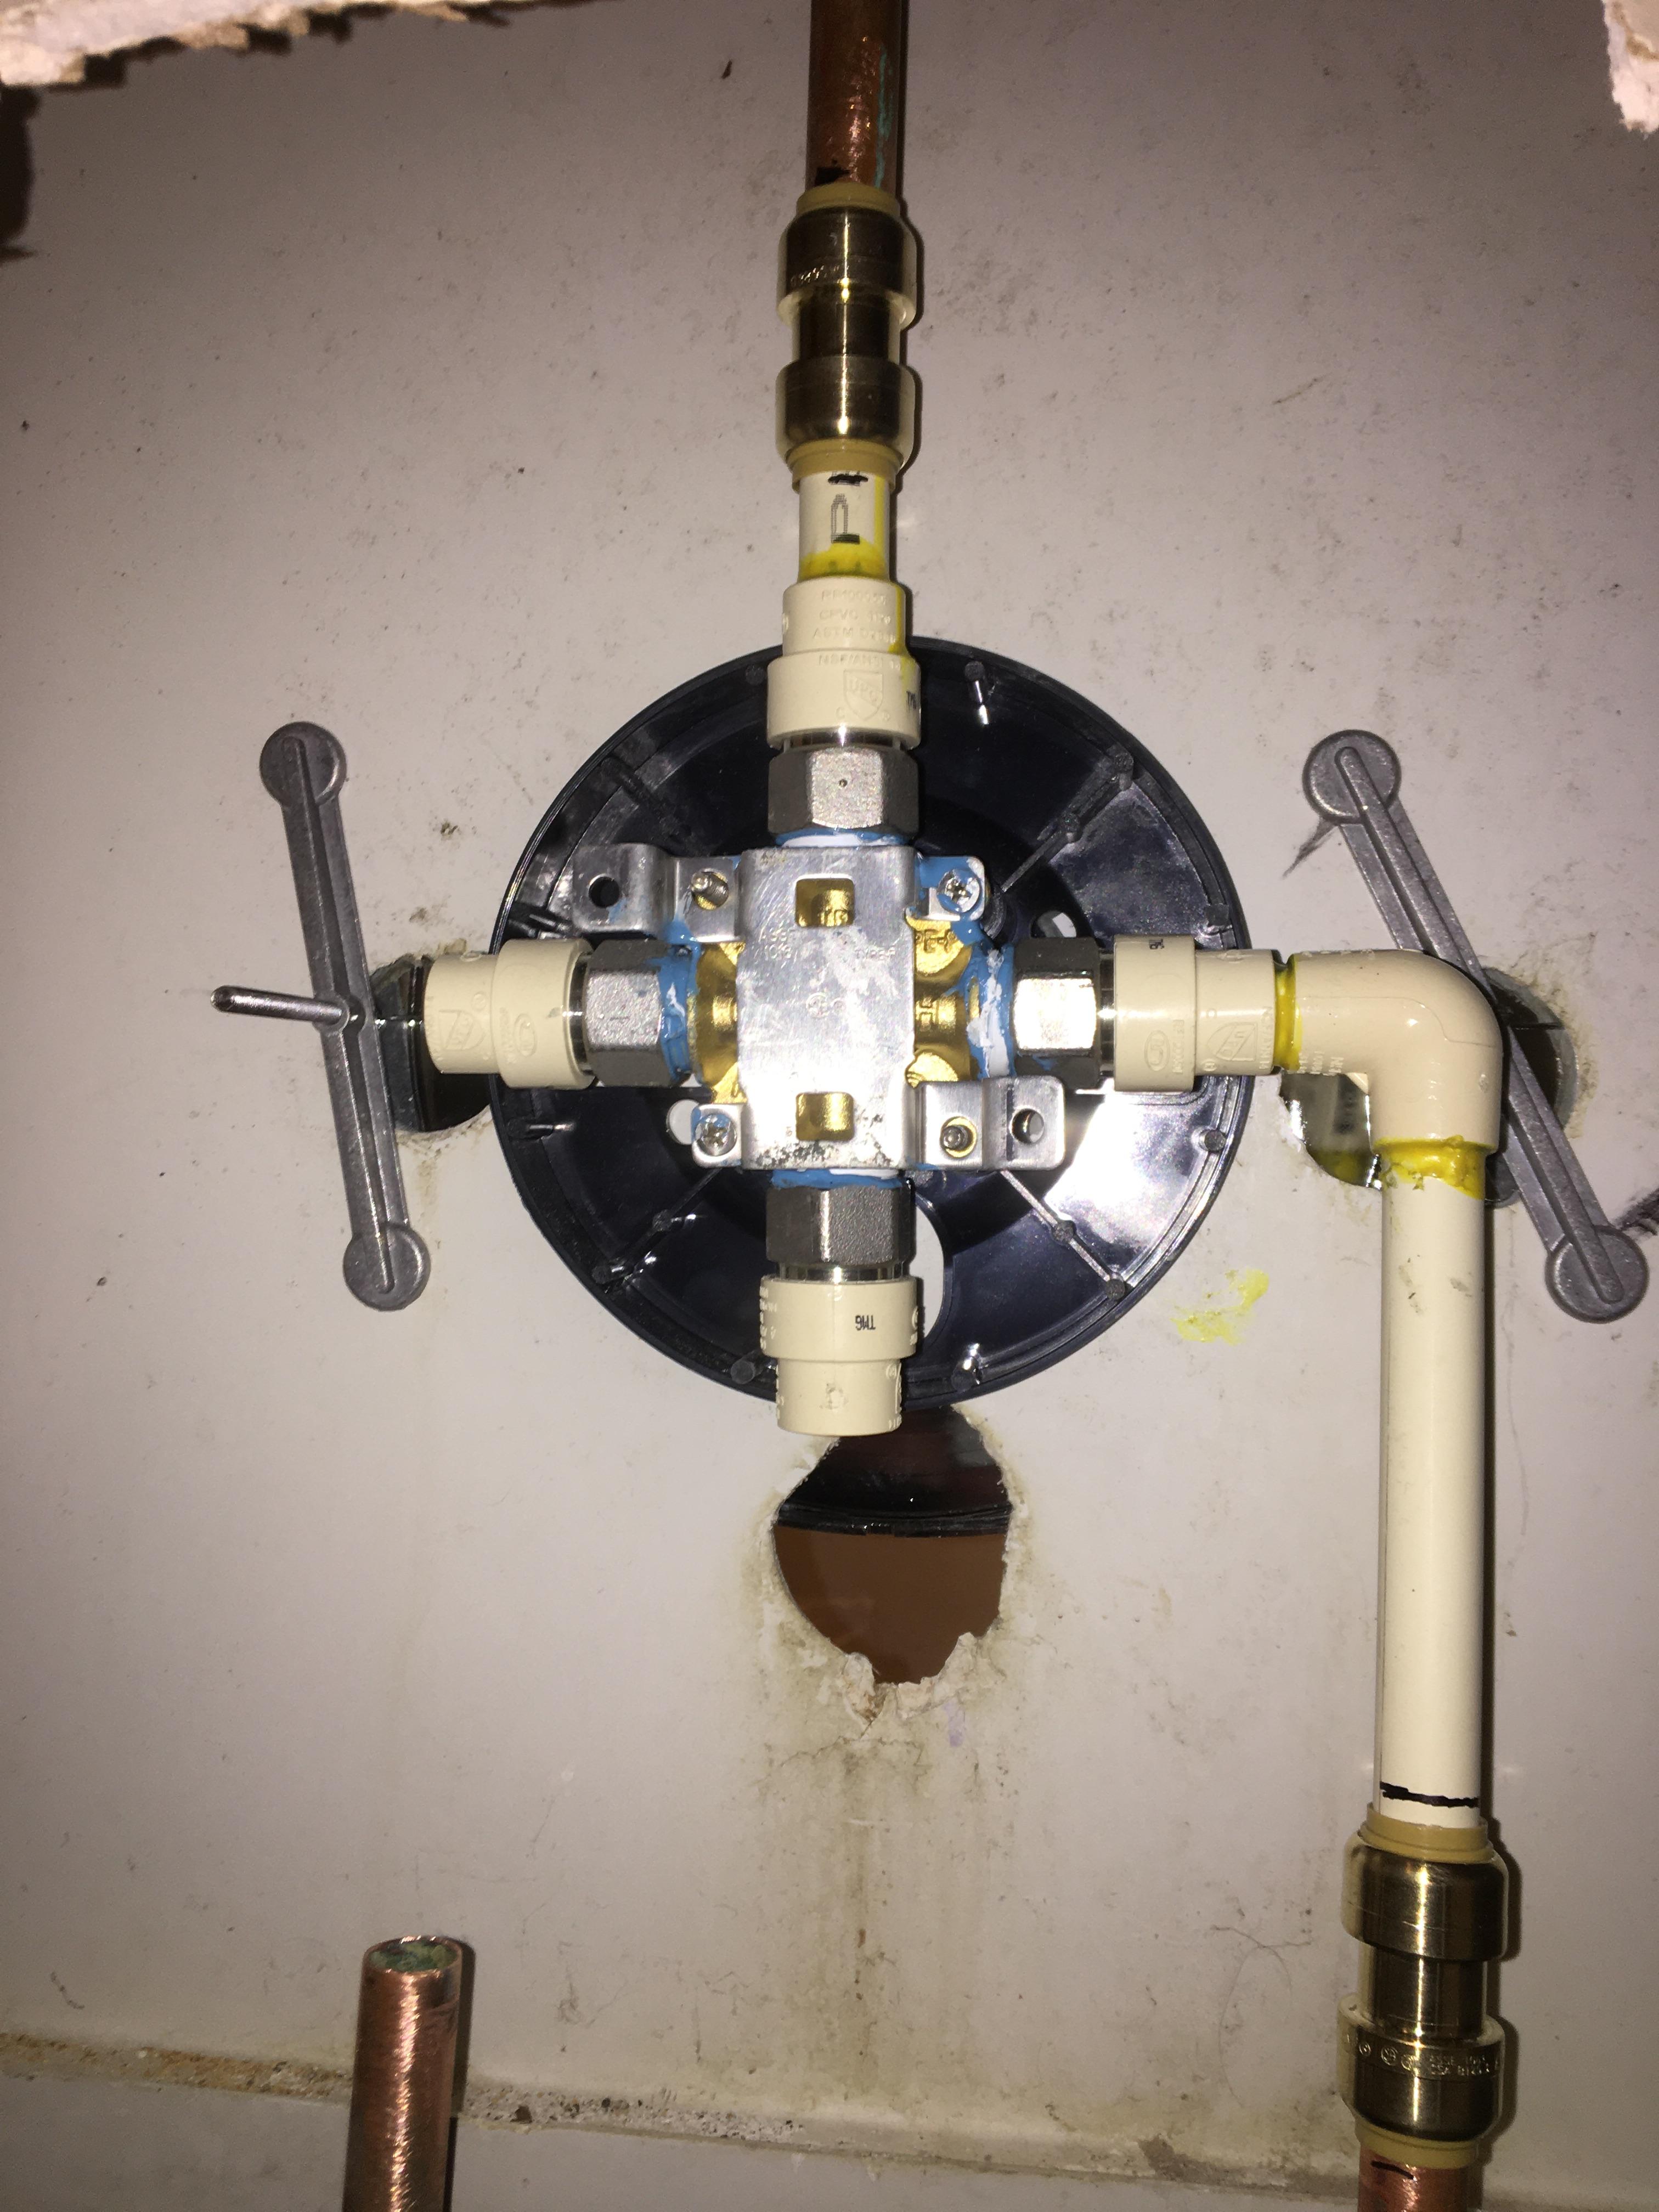
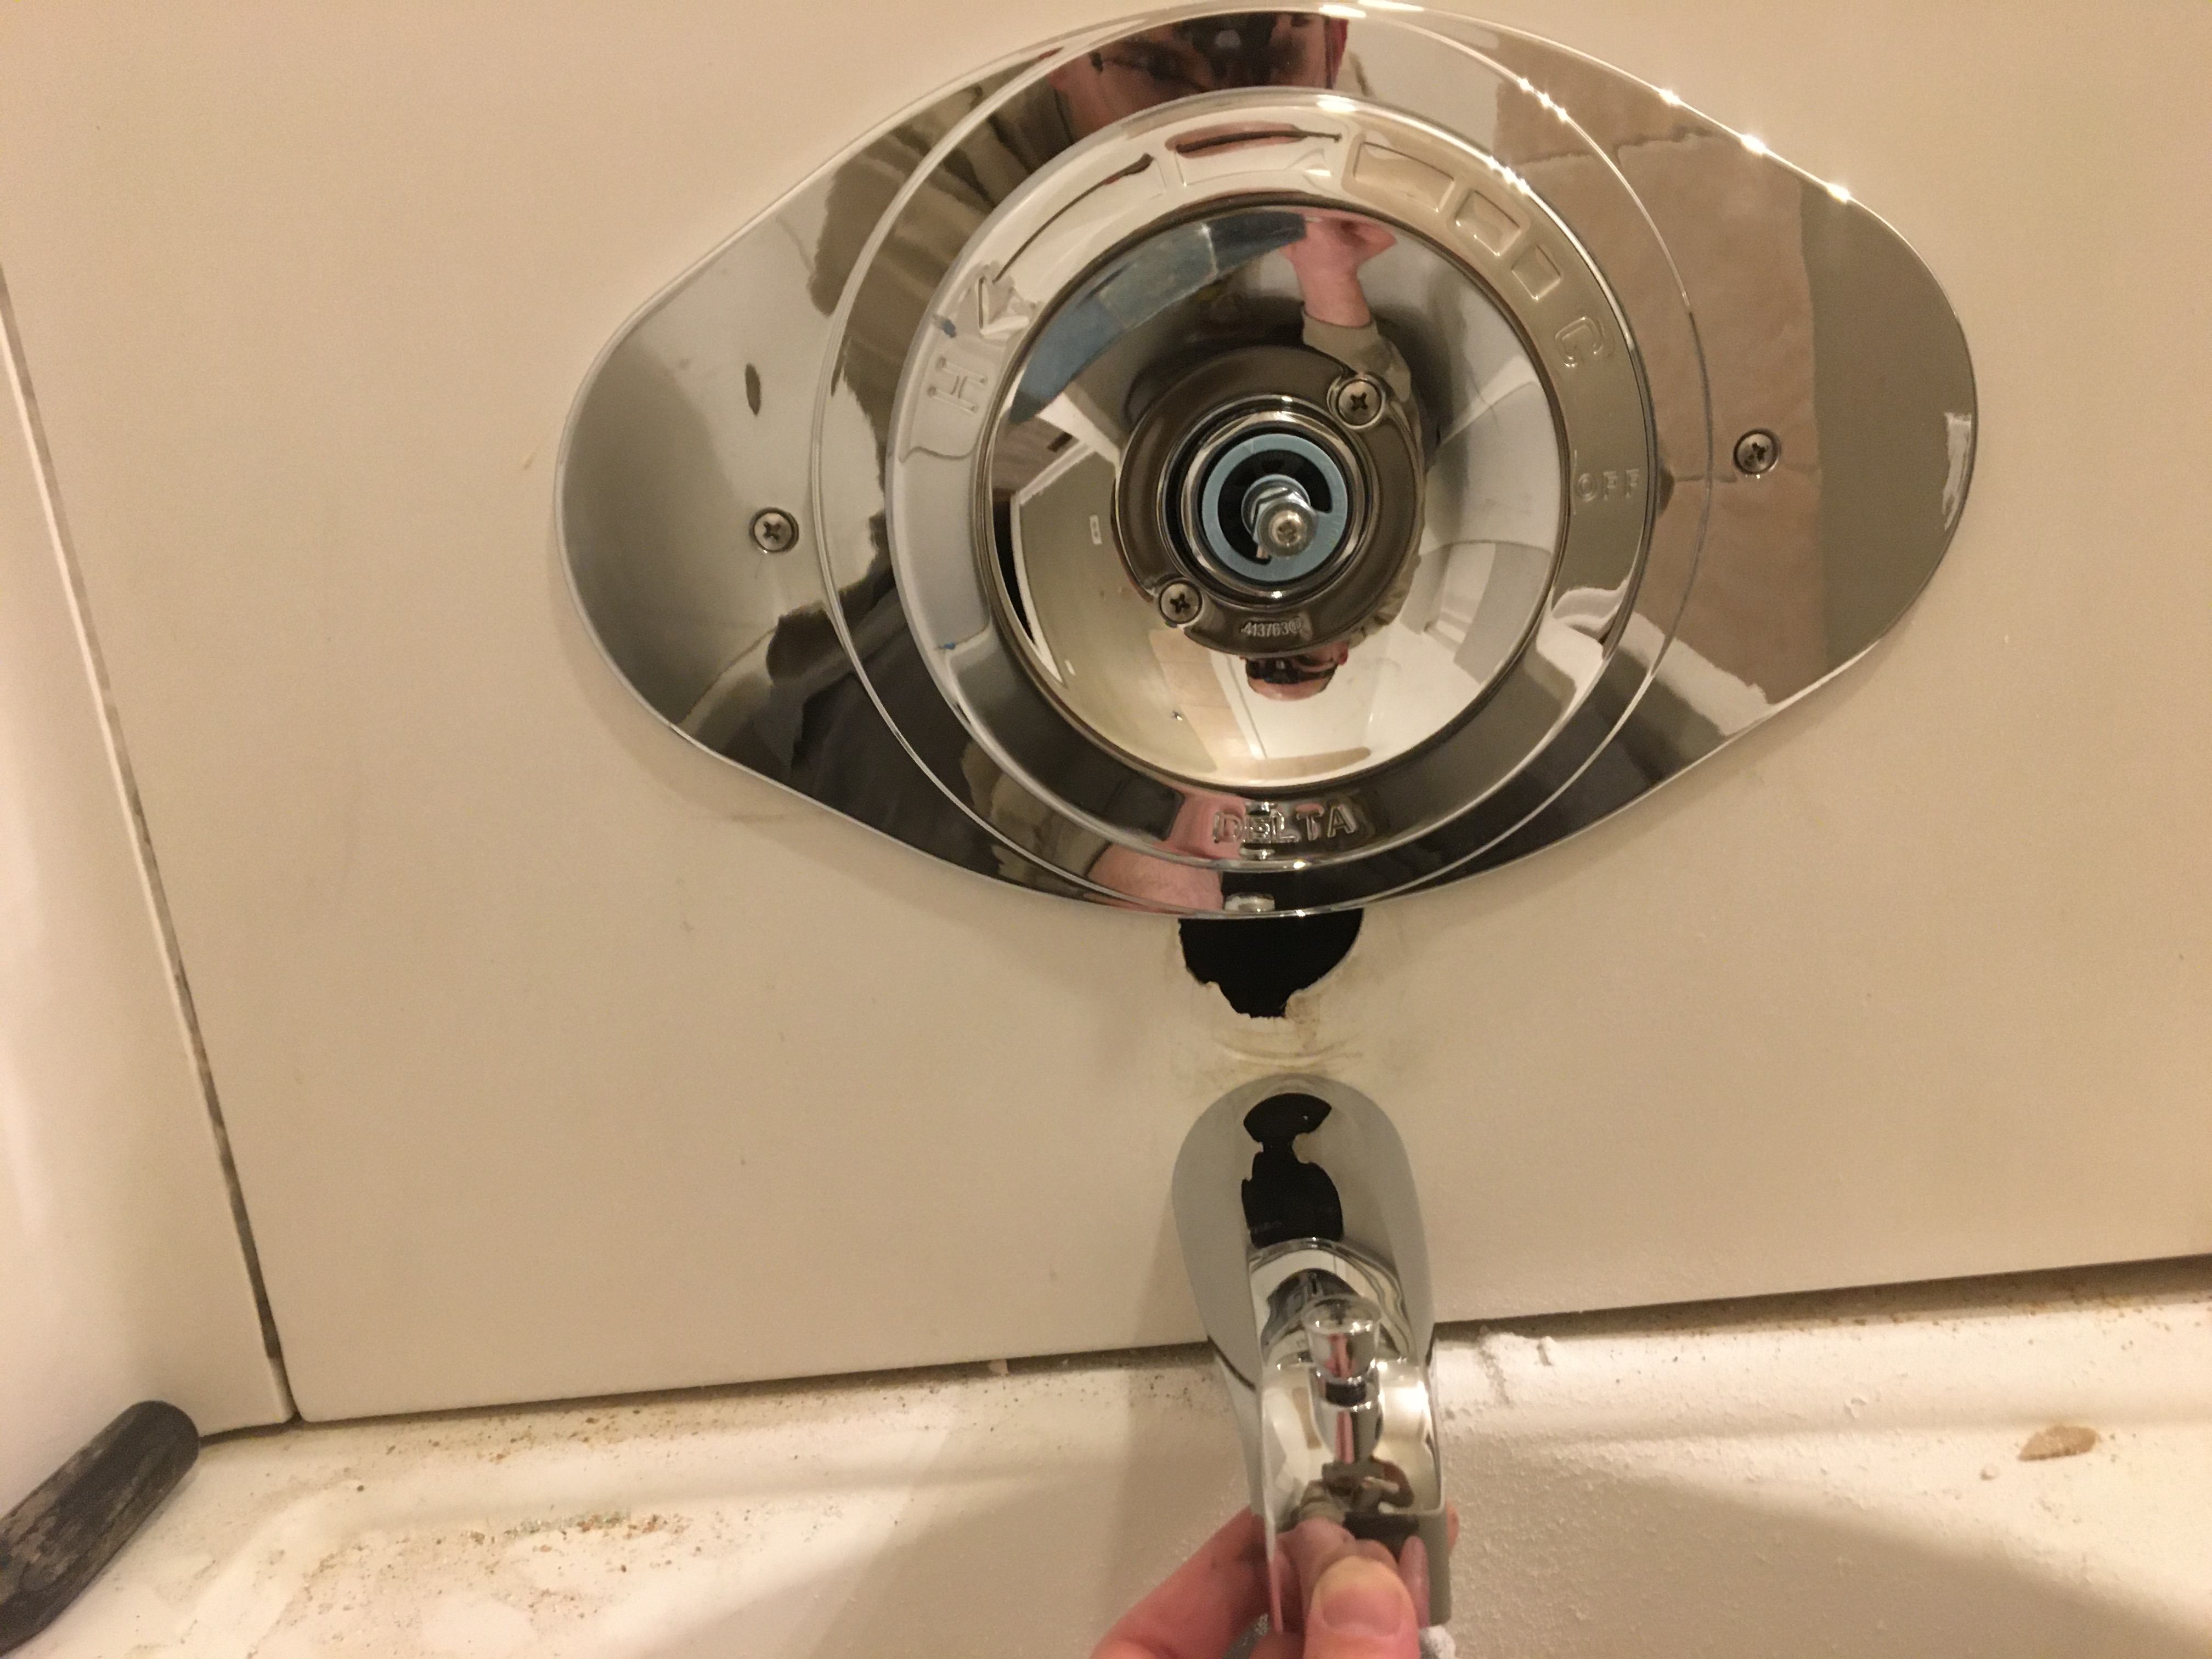
The threads where the bonnet nuts go on the tub handles have stripped out smooth on one side, and I've been having to replace cartridges about every 4 or 5 months from leaks. I'm assuming stripped threads pretty much means the whole shower valve needs replaced?


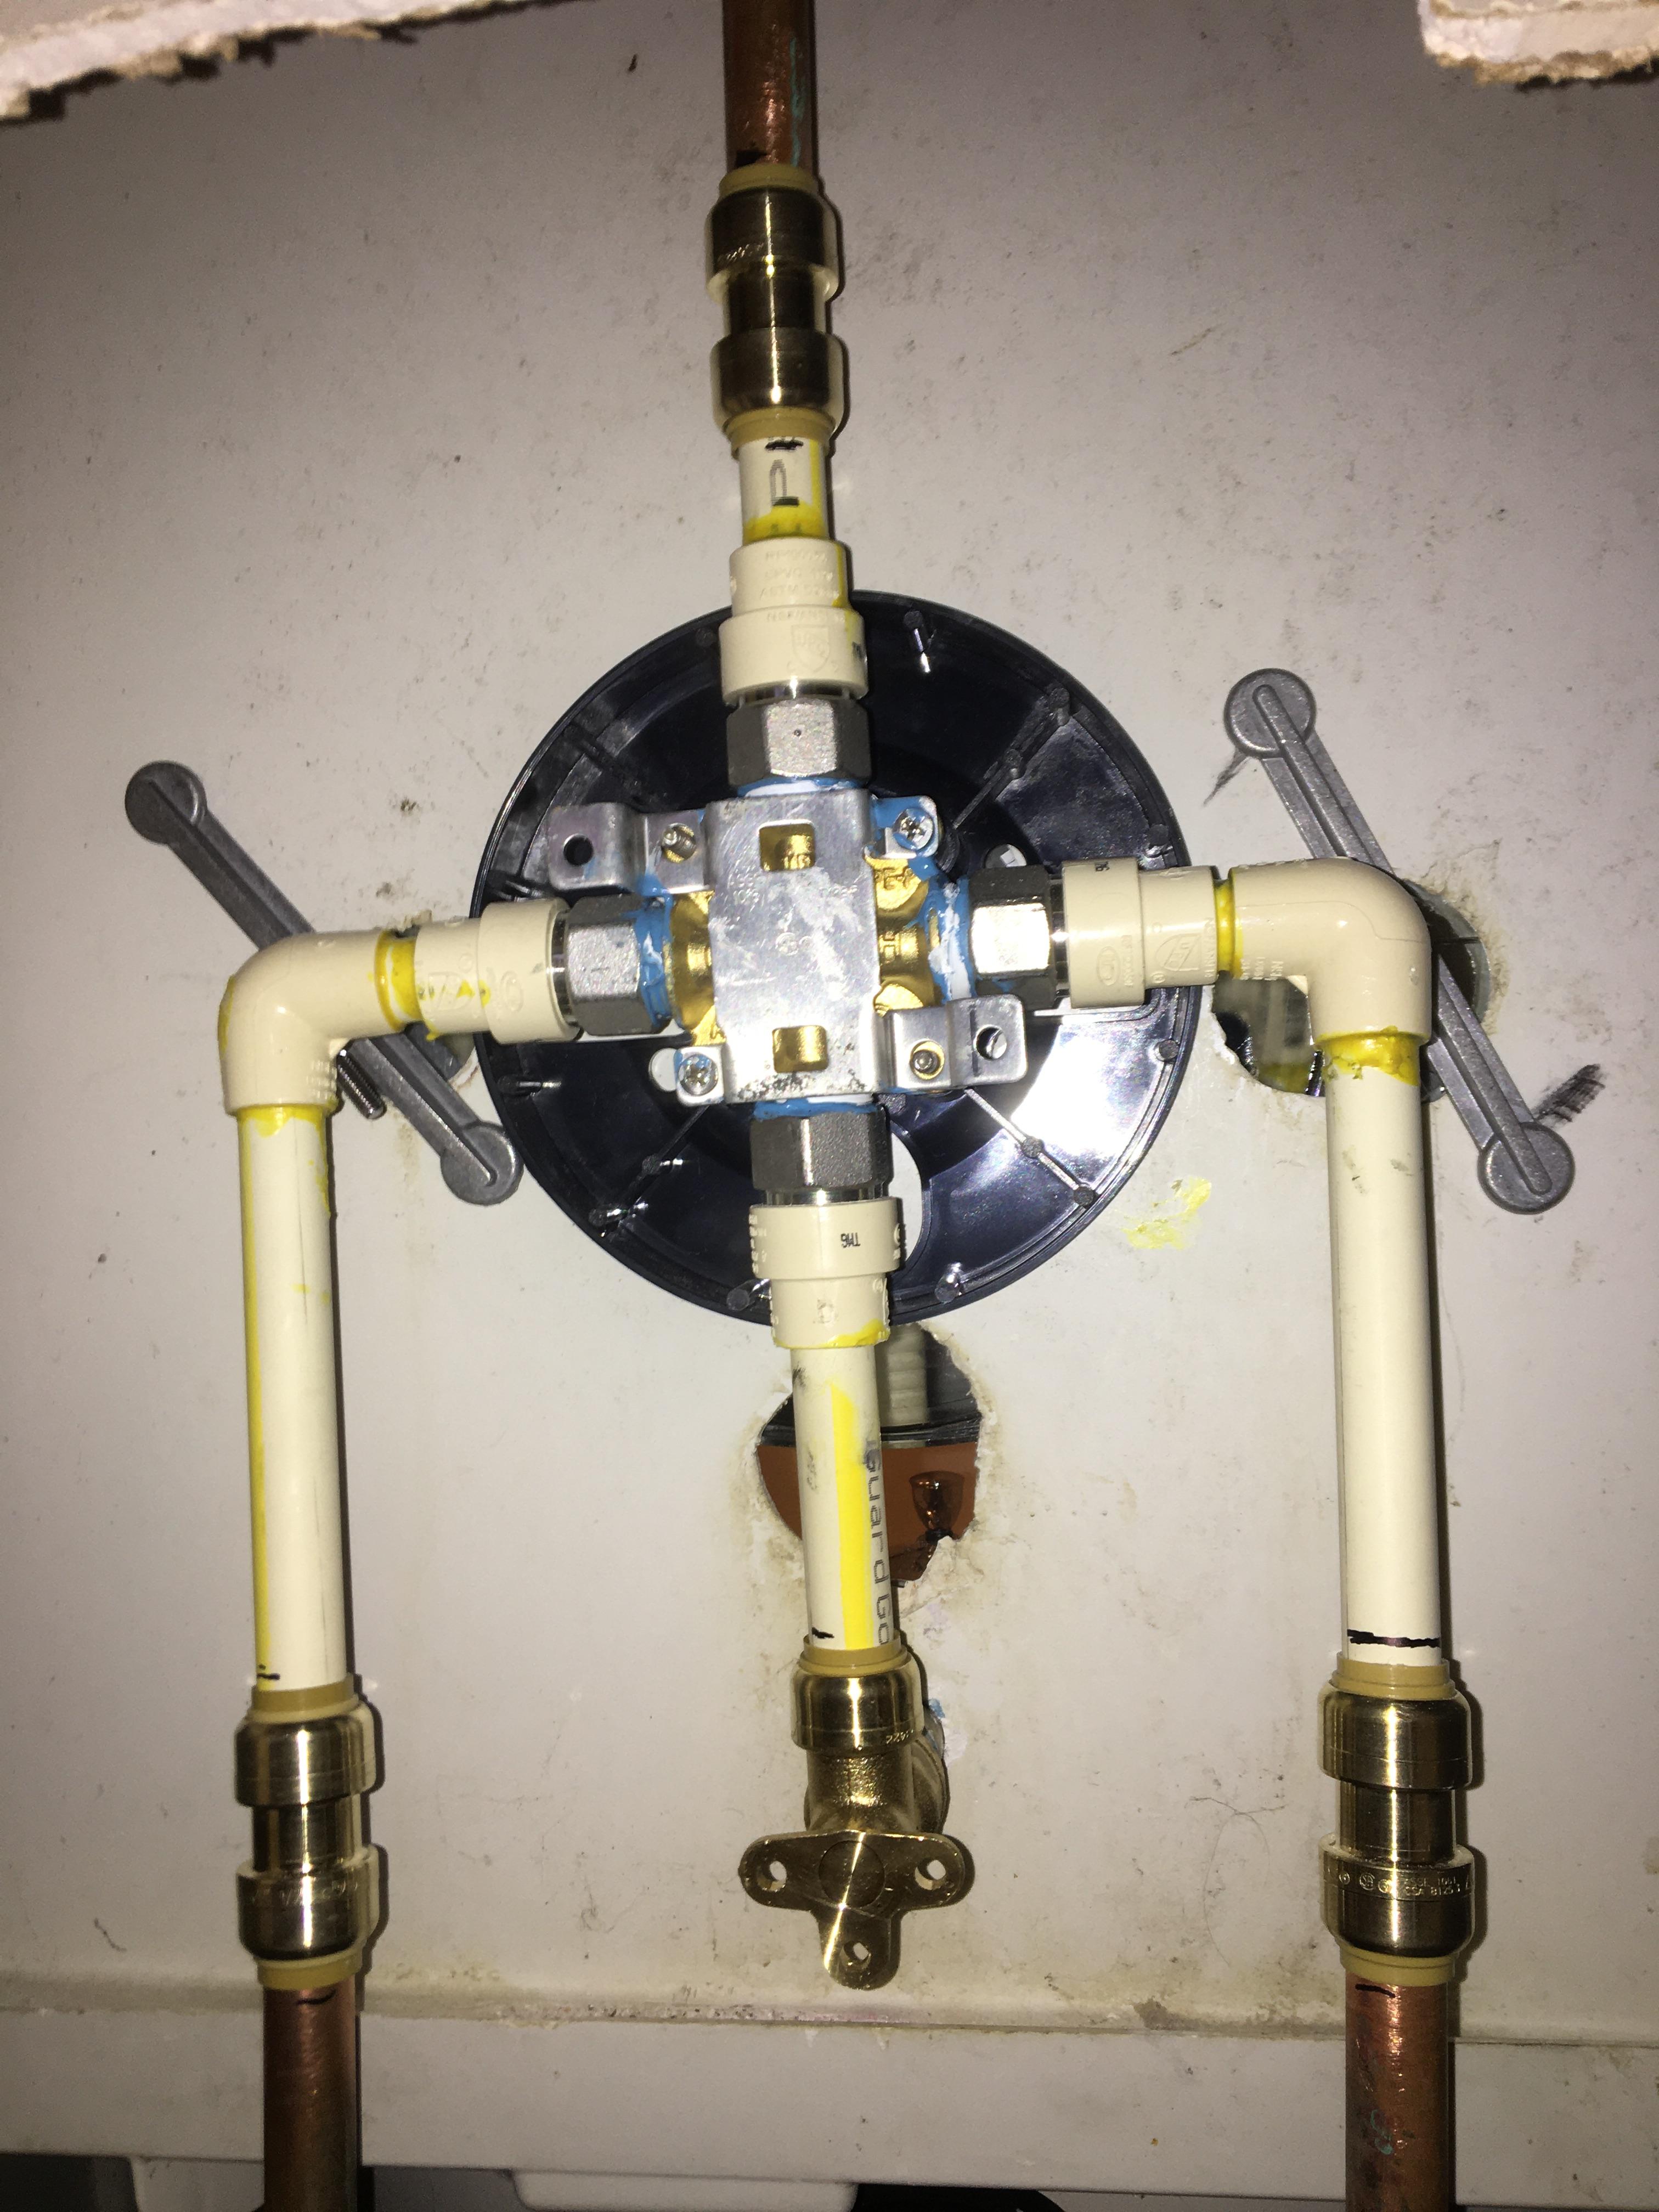
I've done a lot of plumbing DIY, but have never messed with a shower valve, and I just use sharkbites on supply lines. Can I use sharkbites for a shower valve replace? I would probably put in an access panel, so I would have easy access to it for future issues/observations.

If this is something that's feasible, can anyone recommend aa shower valve -- either a specific model, or the general name of the type of valve -- that would be a good replacement? Just want something basic and inexpensive, and like I said, I've never dealt with shower valves before, so I dont know the lingo.


Thanks for any input.

(If I had time, I would learn to solder, but I have a very short window to replace this, so I would prefer to use sharkbites right now.)
 

Sylvan

Still learning
Messages
2,765
Reaction score
694
Points
113
Location
New York
No way would I dare use shark bites as I have to much to lose in case it fails .thankfully a lot of plumbers read their code books that did not approve its use
 

JohnCT

Still learning..slowly
Messages
622
Reaction score
199
Points
43
Location
Northeast
As far as I know, Sharkbites are code allowed for behind the wall use everywhere in the U.S, but you might want to check your local codes. Doesn't mean I would use them...

You might want to take a minute to see if you should be replacing that valve setup with a pressure balancing type valve for those rentals. I am kind of partial to the Symmons Temptrol pressure balancing valve. They've been making them for decades and they work, and they're easy to service. I would just make sure to mount it to a cross board in case you ever need to wrestle the seats out (I hate to rely on plumbing for any shower valve support).

John
 

Tireshark

Member
Messages
72
Reaction score
2
Points
8
Location
Arkansas
Thanks for the replies.

Here's what I found when I opened up the back. There is a 2x4 running slightly below the fixture that is mounted to something solid, and they had laid a loose piece of 2x4 on top of that solid 2x4, I guess to try and provide some resistance when pushing on the pipes. So I guess I will screw a new piece of 2x4 (or stack a couple) into the mounted 2x4, and butt it up to the back of whatever I put in there, unless that wouldn't suffice.


It seems like a lot of people (most?) go to a single handle... is there a particular reason for that? Is it for looks, or is it also less maintenance or something? Is there a big price difference between a one handle setup, and the style that I have?


Tuttles Revenge

In the Trades
Messages
4,176
Reaction score
1,440
Points
113
The reason that most people use a single handle shower valve is because they have built in Pressure Balance / Anti Scald protection built in. They have one single cartridge which just slips in and out to replace rather than 2 or 3 threaded in stems with a bunch of moving parts. Its a no brainer to move to a single handle from a maintenance and safety perspective.
 

Tireshark

Member
Messages
72
Reaction score
2
Points
8
Location
Arkansas
I got a Delta Foundations 1 handle from HD. Right now my plan is to cut the copper supply lines and go sharkbite to cpvc, glue a 90 cpvc fitting, and go into valve with a brass cpvc adapter, like seen in this video:


Any input welcome.
 
Last edited:

JohnCT

Still learning..slowly
Messages
622
Reaction score
199
Points
43
Location
Northeast
I would never use CPVC for anything, but that's me. My fear is running into a situation 10 years down the road when there is a little physical pressure put on the connections when servicing the valve and the CPVC fractures. I would make doubly sure the valve is securely mounted the wall framing and not relying at all on the plumbing for holding it still. Between using CPVC or using a Shark on copper, I'd take the latter.

As long as the wall is open, I'd sweat the valve in and not worry about it again.

John
 

Tireshark

Member
Messages
72
Reaction score
2
Points
8
Location
Arkansas
Thanks JohnCT. I'll have to save the soldering for another day, as I've never done it before. I need to stop putting off learning the basics though, because these sharkbites add a lot of cost to these projects.

I got threaded brass nipples to use for the spout. Using a brass coupler at the valve with a brass nipple into a brass 90, and another nipple out to the spout.

I had to cut the solid 2x4 out to get better access to the pipes, and here is what i have now, with a couple of side shots. Not entirely sure how I'm going to mount it yet, but I guess I will figure it out as I go. Maybe I can toenail in a 2x4 between the joists, but put it closer to the tub than the one I cut out, and screw the valve into it. Then maybe toenail a 2nd 2x4 below that one for the tub spout pipe.

OVrcL7W.png


ZmFO1qD.png


mN6CMnY.png
 

JohnCT

Still learning..slowly
Messages
622
Reaction score
199
Points
43
Location
Northeast
The secret to making a S Bite last is to prep the pipe as much as if you were going to sweat it - perfectly clean and smooth paying particular attention to cleaning the burr from the cut - you don't want to nick the inside O ring when pushing the SB on and a smooth surface ensures the Bite will seal now and for a long time.

John
 

Tireshark

Member
Messages
72
Reaction score
2
Points
8
Location
Arkansas
Here's where I'm at with it. Tub line is going to be cpvc into a drop ear 90, and then a 5" brass nipple into the tub. Let me know if anyone sees anything amiss. I'm going to screw in a 2x4 after I make the connections, and attach the valve to it.

VTd8n4K.jpg


The remodel plate overlaps the existing tub spout, and since adjusting the tub spout just enough to clear it would leave a gap around the spout, I'm thinking about just dropping it a couple of inches so there is no gap around the spout, and then cover up the hole under the remodel cover. Anyone have any ideas how best to do that?

Q11sKvA.jpg
 

JohnCT

Still learning..slowly
Messages
622
Reaction score
199
Points
43
Location
Northeast
What concerns me is the prep of the pipe - it looks like it was done with 80 grit or larger paper. The pipe should be smooth almost like glass before running the SBs on. You need 200 followed by steel wool to get that smooth where you can't feel any defects with your finger nail. Also check the stab depth of that CPVC pipe into the Bite - it looks a bit short.

As far as the hole, I'd check with some local bathroom remodelers and see if they have any scrap sections of enclosure panel you can get. If you can, just bond it from behind.

John
 

Tireshark

Member
Messages
72
Reaction score
2
Points
8
Location
Arkansas
Ah, yeah I used rough sandpaper on it... I'll get some fine paper to use on it, and will monitor the others. I'm going to leave an access panel in place, so it will be easy to check. My mark was a little long on that CPVC, so it should be ok.

I'll keep your idea in mind on the hole, and may use an epoxy repair kit for now.

Thanks for your input John, very helpful.
 

Tireshark

Member
Messages
72
Reaction score
2
Points
8
Location
Arkansas
Well, I got it finished.. Still have to mount it to some blocking, but I had zero leaks when I tested everything.

x1hLtAQ.jpg


9mhjVLB.jpg


I'll attach a parts list if anyone is curious. In total, it cost $310 to convert from 3 handle to 1. I'm really curious what a quote from a plumber would have been, to compare against my more expensive parts list (sharkbites and $40 worth of drill bits).

It was pretty daunting in the beginning, especially since I have never worked on any type of shower valve. I was heavily considering calling a plumber at times, but obviously glad I didn't now. Yes it would have been nice to have avoided all that stress/work, but now I know exactly what's going on behind the wall, whereas before I really had no clue.

Oh, and I guess I now have a $30 (yikes) 3" hole saw that I will probably never use again... anyone want to come pick it up for $10? Hah.

Thanks for the help everyone.

Parts List:

Delta Foundations faucet/valve
1/2" x 1/2" sharkbite coupler (3)
1/2" sharkbite to FIP drop ear elbow
1/2" x 1/2" CPVC slip to stainless FPT adapter (4)
90 degree CPVC fitting (2)
6" brass nipple
pipe dope
CPVC Cement
3" hole saw (main faucet)
1" spade bit (spout pipe)
Danco remodel plate
10' 1/2" CPVC
14" x 14" access panel
 
Last edited:

Reach4

Well-Known Member
Messages
38,858
Reaction score
4,428
Points
113
Location
IL
To your numbers, what if you had paid yourself $20/hour? How much more would the job have been then?
 

Tireshark

Member
Messages
72
Reaction score
2
Points
8
Location
Arkansas
Hard to say, and I'm slow in general. I'd say I spent 2.5 hours researching and watching videos (the instructions in the box were basically worthless for a newbie, although the downloadable app walkthrough was helpful), and 1.5 hours running around town getting parts I needed/forgot. Hands on the tools, 4-5 hours? Very rough estimate.

If I knew what I know now, and had all the tools/parts on hand, I feel like I could do it in around 4 hours.
 
Top
Hey, wait a minute.

This is awkward, but...

It looks like you're using an ad blocker. We get it, but (1) terrylove.com can't live without ads, and (2) ad blockers can cause issues with videos and comments. If you'd like to support the site, please allow ads.

If any particular ad is your REASON for blocking ads, please let us know. We might be able to do something about it. Thanks.
I've Disabled AdBlock    No Thanks