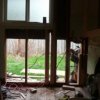
First time shower build.

Users who are viewing this thread

Brihen

New Member
Messages
24
Reaction score
0
Points
1
Location
Oregon
Hi. I am working on rebuilding a small shower, which I plan on probably using the kerdi system. The sub floor is 2x6 t+g and has some rot so I will be replacing some boards, and then covering with 5/8 pw, mortar and kerdi pre slope pan and drain. It is an odd size base 37"x34" so I will have to cut the Kerdi base down. The current drain is located in the center and has a galvy pipe to a cast iron drain. I have a crawl space under it. At what stage of the process do you think it would be best to deal with installing the drain? Since I personally cant get down into the crawl space due to my age, I plan on getting a plumber unless I can work it out from above. Any thoughts on this? 100_0563.jpg100_0574.jpg
 

Attachments

  • 100_0583.jpg
    100_0583.jpg
    90.8 KB · Views: 390

Brihen

New Member
Messages
24
Reaction score
0
Points
1
Location
Oregon
Here is a few more pics. I am also wondering about removing the drain and then can I cover the area with the 2x6 and pw and cut the hole and just have a plumber take it from there?100_0611.jpg
 

Jadnashua

Retired Defense Industry Engineer xxx
Messages
32,770
Reaction score
1,190
Points
113
Location
New England
It isn't the greatest idea to cut the Kerdi shower pans down if you cannot do it symmetrically. It will work, but that means that the bottom row of tile around the perimeter will not be all level. If that doesn't bother you, functionally, it will work. It's less expensive to do a mudbed pan, then put Kerdi on it. But, if you don't want to deal with the weight of that at your age and don't want to pay someone, again, it will work. At 1/4" per foot, the difference won't be much, but it will be there.

The center section of the foam pan that goes underneath the drain breaks off and you can use that as a height guide for the plumber. It is critical that it be at that height and sit perfectly flat on the part you break out. When ready to install the pan, you take those pieces out, add some thinset underneath them, slide them back so that the drain is also bonded (i.e., put thinset on both sides!) and put the rest of the pan down. Or, if you can get him to do everything, but leave the drain unglued, you can glue it after spreading the thinset. and setting the pan in place.

You'll need to replace some ply around the drain. It isn't clear what the joist spacing is...it needs to be strong enough to support your new shower. I'd run this by the people at www.johnbridge.com. You really want to replace all galvanized you have access to...it's not something that is likely to last as long as the shower. Also, can't see the p-trap or if the existing drain is vented.
 

Brihen

New Member
Messages
24
Reaction score
0
Points
1
Location
Oregon
Brihen why not put in a fiberglass pan.

They are lighter.

Faster.

Cheaper.

And you can skip a few days of working on your knees tiling the new shower. No flood test of your work - just the test of the plumber's connection to the new base.

Tile work and Tile Prep is a man's job (sorry ladies a few can but most can't). Bags of mortar 40-60 pounds. Cement Board to run up and into the hose.

It is not an easy job unless you use foam.... Like the Kerdi pan and curb - and then you have a shower built with "FOAM" - insane.

I wanted to use fiberglass, but there is a wall about 9" to the right of the door, where the sink has to go. Could I still use fiberglass if the pan is not open all the way in front?LR-Standard-Shower-Pan-Picture.jpg100_0572.jpg
 

Brihen

New Member
Messages
24
Reaction score
0
Points
1
Location
Oregon
I actually did a much larger br with a tub surround that came out nicely. Its just the pan and crawl space that are a problem.Copy of Sonny 2 Aug 2011 260.jpgCopy of Sonny 2 Aug 2011 293.jpg-12717039327F3B81.jpgCopy (2) of Copy of hall br 022.jpg
 

Brihen

New Member
Messages
24
Reaction score
0
Points
1
Location
Oregon
Not sure the question your asking.

Small benches and tying in Kerdi to a shower pan is easy.

Have you seen the discussion on installing Kerdi Band correctly?

You could do so many things. Are you planning on framed glass, curtain or frameless glass installation?

Not sure yet if framed or frameless. But glass door definitely.
 

Brihen

New Member
Messages
24
Reaction score
0
Points
1
Location
Oregon
Do you think Kerdi or a mud pan would work best here? I would probably be ok with someone (good) putting in a pan, but they usually want to do the whole job?
 

Jadnashua

Retired Defense Industry Engineer xxx
Messages
32,770
Reaction score
1,190
Points
113
Location
New England
A Kerdi shower functions fine either with a foam pan or a mudbed. The advantages of the mudbed are that it can be made to your exact size and is inexpensive, at least for the materials. The foam one, if it meets your size and drain location (or you can cut it symmetrically) also works fine. The test results show it has a compression strength of over 500psi once the membrane and tile are installed...way more than is necessary unless you may be standing on it in high-heel shoes! Some bridges are now using foam as the core of the supports...held in place with concrete. John Whipple thinks anything in foam is junk...so, if you discount that, you'll never get as accurate of slopes as easily without it. I've done both, it just depends on the circumstances. As I get older, while I can, I pay the consequences of dealing with the weight of mixing, lugging, setting the stuff...it was certainly much easier when I was younger! The pan needs to be set over plywood, not planks, so you'd need at least to add a layer of 5/8" ply on your planks. You could do a mudbed on them, but that would make it slightly thicker overall, since the mudbed needs some thickness over a subfloor for strength, the foam will survive fine IF the area is level, or you make it level first. ANother advantage of a mudbed...you can easily get things nice and level.

If you want a bench in the shower, there are lots of ways to make one. WHen using Kerdi, you can do a monolith, a wooden framed, a foam, and one I've used and like, a floating bench (www.betterbench.com). I like the floating bench in a smaller shower since if you're facing it, your feet can use that space, otherwise, the shower just feels smaller. The key is to just make sure it is solid and you cover it like the walls of your shower with the membrane. Most come with a slope, but if not, add one, and then tile it.

If you want a friendly group to help, check out www.johnbridge.com. There, you'll get multiple professional's opinions, rather than one, here. They've helped literally thousands of people build reliable showers with various methods, including Kerdi, but also Noble, Wedi, and conventional methods...there are lots of tested, approved methods, and any done right works. Building a shower isn't hard, but it is detail oriented...well, it can be hard work, but not hard to comprehend. There's no reason to try to reinvent the wheel...the approved methods are pretty well laid out. You just need to pick one, and run with it.

If someone isn't familiar with Kerdi and how to use it, or willing to study a little bit and ask questions, you could run into issues. But, that's true with any shower construction method...there's a right way to do it, and lots more wrong ways. The basics on Kerdi are pretty simple, though...wash down the walls to get dust off and add some moisture so they don't suck it out of your thinset before you get the membrane on, embed it properly in the thinset - pull back a section to check for coverage (it should have an even cover of thinset embedded into the fabric's fleece), and have at least a 2" overlap on any seams. If you have full coverage and the overlap and use the proper sized trowel, it works. Doesn't matter if you do it in smaller pieces as you learn the technique. Working with really large pieces is not a good idea when you are just learning, but most people catch on fairly quickly.

I find it works better for me to put up the Kerdiband first, then put the sheets over them. The thinner, smaller, strips of Kerdiband lay into place better that way, and you aren't catching the edge when smoothing and embedding it with the second layer . That's also the way they show it being done on the video, but either way works fine.
 

Brihen

New Member
Messages
24
Reaction score
0
Points
1
Location
Oregon
Thanks. yes I planned on top quality 5/8 pw with quickset base and the Kerdi pre formed foam. I have looked at john bridges web site and will probably get his book on Kerdi. So far I have not found any plumbers out here in Portland OR. Who know about the drains, so I might have to tackle that myself.
 

Jadnashua

Retired Defense Industry Engineer xxx
Messages
32,770
Reaction score
1,190
Points
113
Location
New England
The ply should be screwed to the planks, and it should run across the joists for proper strength. YOu install the pan like a big tile...thinset it down. The floor needs to be level before you put the pan down. You can make your own kerb out of 2x4's, pavers, bricks, or the foam. If you use wood, you need to cover it with a suitable material for the Kerdi to stick to first.
 

Brihen

New Member
Messages
24
Reaction score
0
Points
1
Location
Oregon
Thanks. I think I will use foam, because I am thinking of getting the whole 48x48" shower kit, even though I will have to cut it down to size.
 

Jadnashua

Retired Defense Industry Engineer xxx
Messages
32,770
Reaction score
1,190
Points
113
Location
New England
Your in good hands here Brihen. Jim has taken not one but two Schluter Workshops. That's a lot.

I think the foam shower bases are total and utter crap. Whoops - did that slip out.

Good Luck - I can offer up no advice since my best advice is to not use one.

Well, think about the hundreds of thousands of successful Kerdi showers that have been built, the manufacturer that understands their product and market, and the hundreds of pros that I know that build showers with the stuff (most, agreeably do not use the foam pan, but when it fits their size requirement, do), why not! That one person doesn't like them is kind of irrelevant. In their place, the foam pan works, is fast, has perfect slope, and something a first time DIY'er can do quickly and easily. A mud pan is more customizable and less expensive IF you want to learn the skill and can lift the materials. If you have to pay someone to do it, a new shower may not be in the making.

So, while obviously not the only solution, it IS a solution that works. Not everyone can afford to pay a pro and spend many thousands on a needed remodel.
 

Dhagin

builder:anti-builder
Messages
101
Reaction score
0
Points
0
Location
Oahu
Hi Brihen. :)

We build our shower floors outa mud, and, as Jim noted, they're individually customizable to any size, cheap, and rock solid. The foam pans work too, but it's very important that they're bedded properly over a level substrate. If the plywood & planks aren't level, then you'll need to remedy that before setting the foam pan. And although Schluter doesn't have a minimum tile size, suggest you use 2x2 floor tiles minimum over the foam. :)
 

Brihen

New Member
Messages
24
Reaction score
0
Points
1
Location
Oregon
IMAG1002.jpgIMAG1007.jpgThanks for the replies everyone. What do you think would be the best way to deal with this drain? Cut it or attempt to unscrew it? I am thinking cut the galv pipe about 1/2 down and add a rubber coupling?
 

Dhagin

builder:anti-builder
Messages
101
Reaction score
0
Points
0
Location
Oahu
The best solution would be to remove all the galvanized pipe. Short of that, remove all you can.

Cut it as far back as you can, then use a ferco or equal coupling and replace with abs or pvc. :)
 

Brihen

New Member
Messages
24
Reaction score
0
Points
1
Location
Oregon
Looking at the toilet flange I see what seems to be fairly superficial flakey rust in places, mostly inside the pipe and along the outside edge of the 1/4" flange itself. I do not see any cracks or leaks. Also the two bolts look like they could be reused, but there is some rust where they go into the flange. Can these flanges be redrilled if needed? I am really hoping to not have to replace this pipe. It looks good under where the wax had covered it. The old wax is still in place covered with sawdust in the pictures, and look worse than in person. Any suggestions with this? I have heard these leaded cast iron flanges can hold up well.\, as ugly as they look.100_0641.jpg100_0648.jpg
 

Jadnashua

Retired Defense Industry Engineer xxx
Messages
32,770
Reaction score
1,190
Points
113
Location
New England
Clean the old wax off, wire brush it to see what's what, then decide. It's likely it has many years left, but it's hard to tell as it sits. The bolts may come out, and could be replaced with solid brass or SS, but you'd be able to tell once you get it cleaned up a bit.
 

Brihen

New Member
Messages
24
Reaction score
0
Points
1
Location
Oregon
OK. I will do that and take some more pics. What would I look for to tell if it is no good?
 
Top
Hey, wait a minute.

This is awkward, but...

It looks like you're using an ad blocker. We get it, but (1) terrylove.com can't live without ads, and (2) ad blockers can cause issues with videos and comments. If you'd like to support the site, please allow ads.

If any particular ad is your REASON for blocking ads, please let us know. We might be able to do something about it. Thanks.
I've Disabled AdBlock    No Thanks