Hairyhosebib
New Member
I would like to make an attempt at sharing some information about pipe insulation. Hopefully I will be able to post some pics of how to make fitting covers and install insulation properly. I have 30+ years of plumbing, drain cleaning and pipe insulation experience at two University/research settings.
Is pipe insulation important? Yes it is. Most people only recognize it's importance in saving money by keeping plumbing systems to a particular temperature. It is also used as a sound deadening on drains. To the average homeowner it should mean another way to stop mold from growing in those dark , quiet covered places where nobody ever looks. Mold can be very dangerous and cause health problems for you , kids and pets. Condensation or sweating pipes is common and is just asking for mold to grow where there is moisture. If it can help stop this, then it's price and time is well worth it's price.
Another thing about pipe insulation that really seems to bother people is what happens if it catches fire? I can certainly tell you, the last thing I'm going to worry about when my house is burning down around my ears is how toxic the fumes are that are being produced by a few feet of burning pipe insulation. Take a look around your home. Pretty much everything you have in your home could be made from some man made material that will burn. A huge number of items are made from plastic which is derived from oil. When it burns, IT'S TOXIC!! Isn't it nice to know that our government cares that we don't die from toxic smoke from pipe insulation but we can from other items?
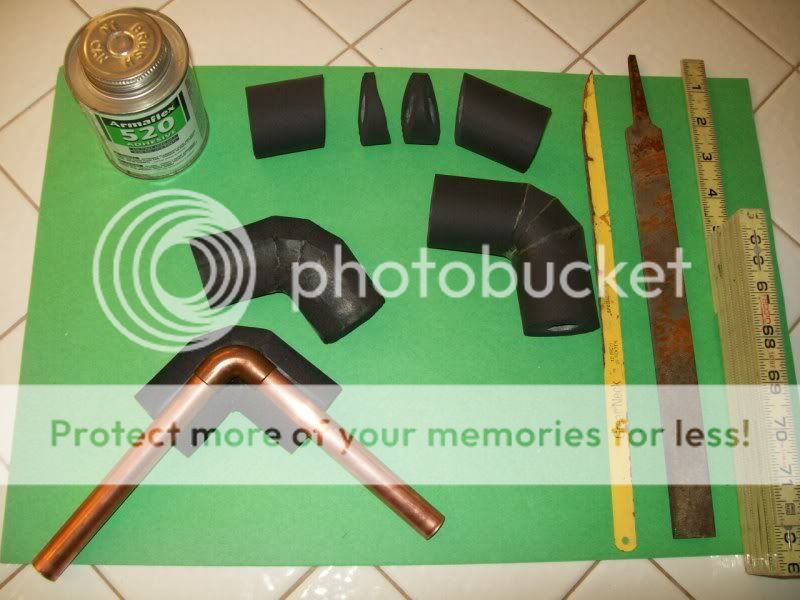
For the typical homeowner I suggest using the Armaflex ARMACELL foam pipe insulation with a minimum 1/2" wall thickness. I see Home Depot sells it in a 3/8" thick wall that is pre split with the tape. I would steer clear of this and seek out a plumbing supply house that sells the solid tubes. You will need to buy the Armaflex 520 adhesive too. You will learn to cut angles with a knife so it is better to handle when the wall thickness is 1/2" and not already split open.
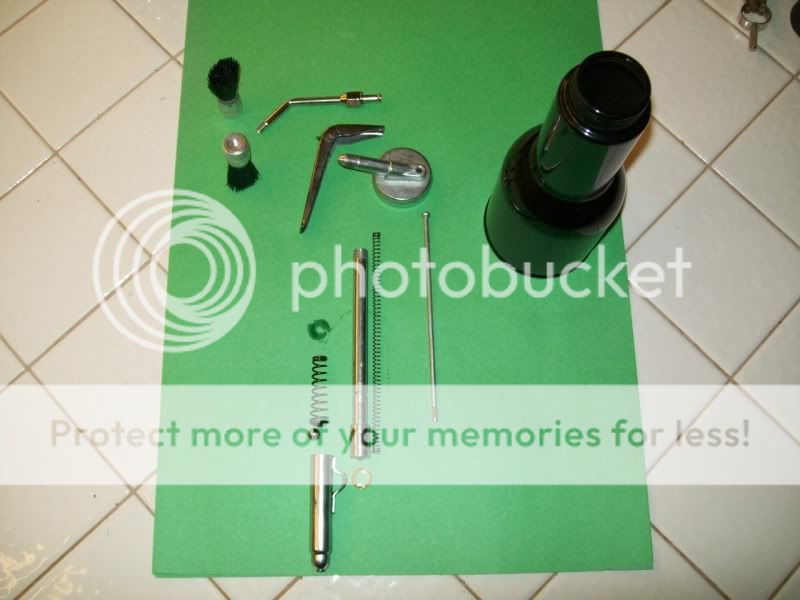
You only need some simple tools and the adhesive to do a nice job with little practice that I will share.
1. Knife= I use a hacksaw blade that I sharpen down on the back edge to a point. It will need to be pointed. I would not use a utility knife, you need something with some length to it. Also this material will dull a knife blade quickly. A hacksaw blade does a great job when roughed up with a good file. Saw blades are cheap too. You could use a steak knife but you will need to keep it roughed up. You could use the teeth of the saw blade but the edge will be rough, you still need a point to stick in the insulation to cut circles.
2. Ruler
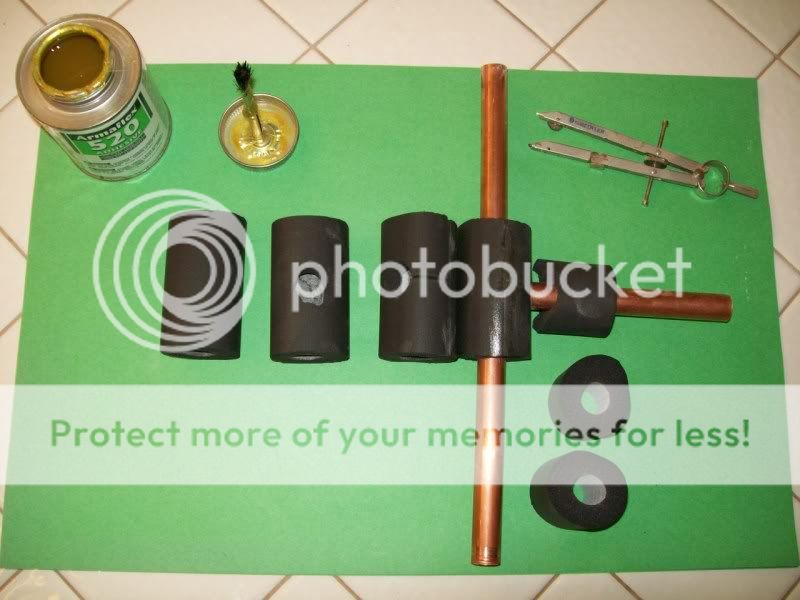
3. compass? It's one of those drafting tools that makes circles. I have been referring to it as the fancy circle maker for so long, I really don't remember what you call it. It has a needle on one side and a pencil on the other to draw circles.
4. rags
5. WD40= to put on the rag to clean the adhesive from wherever it gets on that you don't want it on.
6. Adhesive = to glue pieces together with. You will put a thin film of the glue on each surface, wait a minute and join the pieces together. OH! it's toxic and very flammable too!
7. gloves= optional. cotton, not rubber. Glue will eat the rubber. I personally don't use them for this.
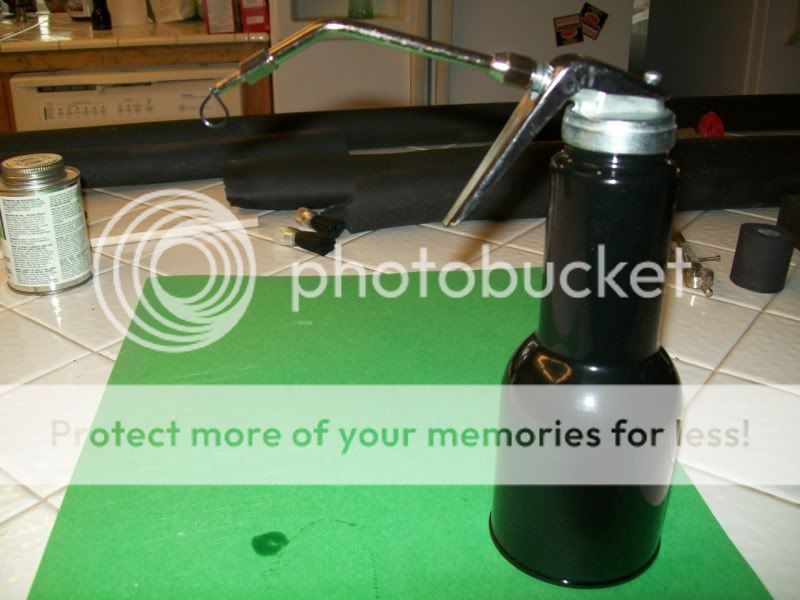
8. glue gun and brush= an optional tool if you have a lot of insulation to put on. A seriously cool tool sold by MCMASTER CARR. Basically, it's a pump type oil can with a really nice brush that screws on. A REAL TIME AND GLUE SAVER! It is made by PLEWS TOOLS.
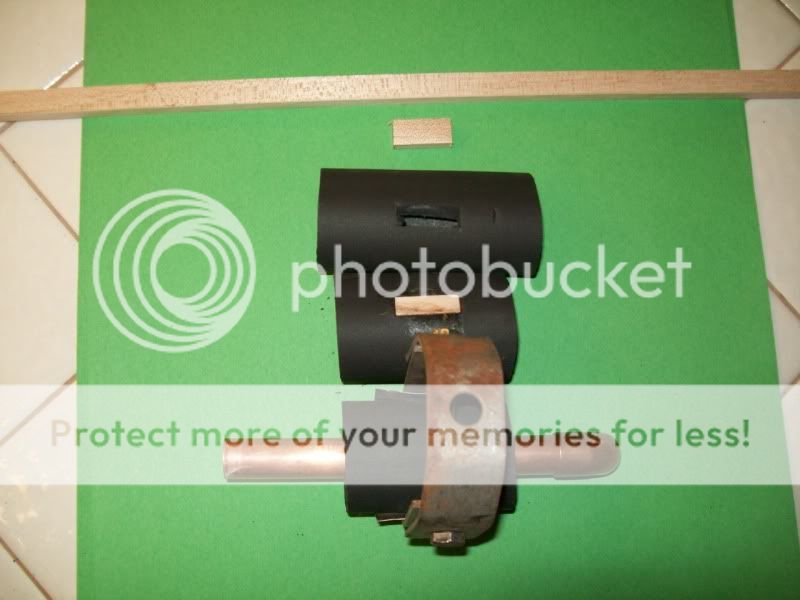
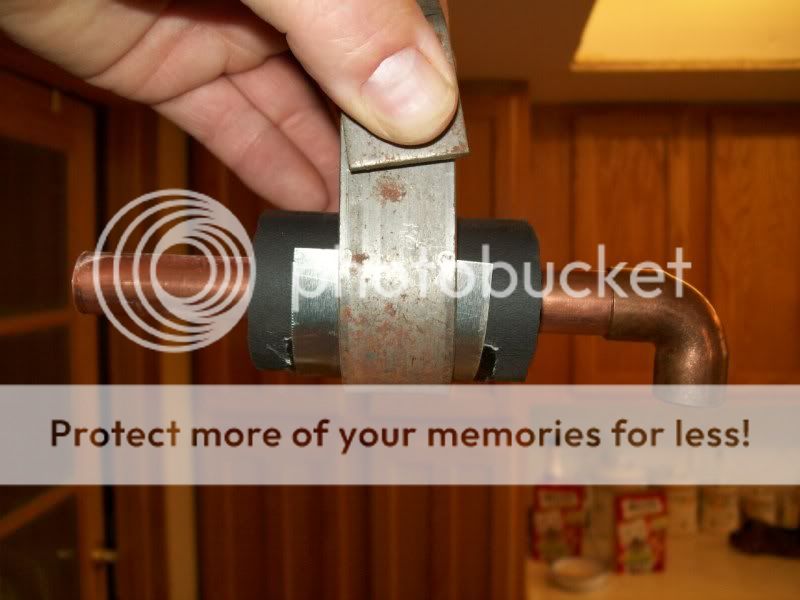
9. Narrow pieces of wood , they could be 1" inch long and 1/2" square. A hardwood is best. You will need these where pipe is hung with pipe strap, ETC.
10. Some good duct tape. You will need this for covering the piece of wood where you have cut a small rectangle and glued in the piece of wood to support the weight of the pipe with water in it so it does not flatten the insulation on the underside of the pipe.
If you are building or remodeling a home you will need to make the holes for your pipes at least 1" inch bigger than the pipe and 2" would be better. Make certain that you have plenty of room between the pipes to make the insulation fit around the pipe without it getting squeezed or pinched. Be sure to take in account for extra room of valves and unions too. Squeezing, pinching and tie wraps are big NO NO's If the outer skin is damaged, coat it with the glue or paint it with glossy water borne paint to identify if it is a hot or cold pipe.
If you are going through a floor, you may want to take a piece of rolled metal or bigger pipe and put in the hole to sleeve it first. Then install your pipe, then the insulation. As you install the piping system you can cut pieces a couple inches shorter and slide over the pipe as you go. Take great care not to damage the inner or outer skin. keep the unused sections in a safe place to avoid damage. If a piece of pipe or metal gets laid across it, it will get permanently squished down. Cut out and discard areas that get squished or poked. I am in no way affiliated with the Armacell company. I am doing this on my own for your information.
MORE LATER
Is pipe insulation important? Yes it is. Most people only recognize it's importance in saving money by keeping plumbing systems to a particular temperature. It is also used as a sound deadening on drains. To the average homeowner it should mean another way to stop mold from growing in those dark , quiet covered places where nobody ever looks. Mold can be very dangerous and cause health problems for you , kids and pets. Condensation or sweating pipes is common and is just asking for mold to grow where there is moisture. If it can help stop this, then it's price and time is well worth it's price.
Another thing about pipe insulation that really seems to bother people is what happens if it catches fire? I can certainly tell you, the last thing I'm going to worry about when my house is burning down around my ears is how toxic the fumes are that are being produced by a few feet of burning pipe insulation. Take a look around your home. Pretty much everything you have in your home could be made from some man made material that will burn. A huge number of items are made from plastic which is derived from oil. When it burns, IT'S TOXIC!! Isn't it nice to know that our government cares that we don't die from toxic smoke from pipe insulation but we can from other items?
For the typical homeowner I suggest using the Armaflex ARMACELL foam pipe insulation with a minimum 1/2" wall thickness. I see Home Depot sells it in a 3/8" thick wall that is pre split with the tape. I would steer clear of this and seek out a plumbing supply house that sells the solid tubes. You will need to buy the Armaflex 520 adhesive too. You will learn to cut angles with a knife so it is better to handle when the wall thickness is 1/2" and not already split open.
You only need some simple tools and the adhesive to do a nice job with little practice that I will share.
1. Knife= I use a hacksaw blade that I sharpen down on the back edge to a point. It will need to be pointed. I would not use a utility knife, you need something with some length to it. Also this material will dull a knife blade quickly. A hacksaw blade does a great job when roughed up with a good file. Saw blades are cheap too. You could use a steak knife but you will need to keep it roughed up. You could use the teeth of the saw blade but the edge will be rough, you still need a point to stick in the insulation to cut circles.
2. Ruler
3. compass? It's one of those drafting tools that makes circles. I have been referring to it as the fancy circle maker for so long, I really don't remember what you call it. It has a needle on one side and a pencil on the other to draw circles.
4. rags
5. WD40= to put on the rag to clean the adhesive from wherever it gets on that you don't want it on.
6. Adhesive = to glue pieces together with. You will put a thin film of the glue on each surface, wait a minute and join the pieces together. OH! it's toxic and very flammable too!
7. gloves= optional. cotton, not rubber. Glue will eat the rubber. I personally don't use them for this.
8. glue gun and brush= an optional tool if you have a lot of insulation to put on. A seriously cool tool sold by MCMASTER CARR. Basically, it's a pump type oil can with a really nice brush that screws on. A REAL TIME AND GLUE SAVER! It is made by PLEWS TOOLS.
9. Narrow pieces of wood , they could be 1" inch long and 1/2" square. A hardwood is best. You will need these where pipe is hung with pipe strap, ETC.
10. Some good duct tape. You will need this for covering the piece of wood where you have cut a small rectangle and glued in the piece of wood to support the weight of the pipe with water in it so it does not flatten the insulation on the underside of the pipe.
If you are building or remodeling a home you will need to make the holes for your pipes at least 1" inch bigger than the pipe and 2" would be better. Make certain that you have plenty of room between the pipes to make the insulation fit around the pipe without it getting squeezed or pinched. Be sure to take in account for extra room of valves and unions too. Squeezing, pinching and tie wraps are big NO NO's If the outer skin is damaged, coat it with the glue or paint it with glossy water borne paint to identify if it is a hot or cold pipe.
If you are going through a floor, you may want to take a piece of rolled metal or bigger pipe and put in the hole to sleeve it first. Then install your pipe, then the insulation. As you install the piping system you can cut pieces a couple inches shorter and slide over the pipe as you go. Take great care not to damage the inner or outer skin. keep the unused sections in a safe place to avoid damage. If a piece of pipe or metal gets laid across it, it will get permanently squished down. Cut out and discard areas that get squished or poked. I am in no way affiliated with the Armacell company. I am doing this on my own for your information.
MORE LATER
Last edited: