Look What I accomplished in day#3 work on the remodel bathroom

Users who are viewing this thread

chubyball

New Member
Messages
27
Reaction score
0
Points
0
Location
Ohio
I also post pictures in "Any suggestions and ideas?"
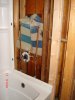
Here is what I have accomplished today. I just set in the tub and drain, new P-traps and weld the new shower valve KOHLER brand. I took me all day to work on just the tub and shower valve only.

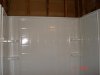
Tomorrow I will get ready mount the tub to the wall and pull some Tinsel under the tub, then I will hook up the shower pipe and and bottom water pipe and insert the rest of wall surround to the tub.

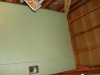
What do you guys think about my new tub and new celing dry wall?
 

Attachments

  • tub4.JPG
    tub4.JPG
    62 KB · Views: 838
  • tub1.JPG
    tub1.JPG
    38.6 KB · Views: 825
  • tub2.JPG
    tub2.JPG
    30.5 KB · Views: 816
  • Ceil.JPG
    Ceil.JPG
    47.1 KB · Views: 804

Cass

Plumber
Messages
5,947
Reaction score
7
Points
0
Location
Ohio
Looks good.

Did you level the tub?

Did you check what the distance was from the wall studs to the finished surface of the tub wall so the valve would be set right?
 

hj

Master Plumber
Messages
33,603
Reaction score
1,042
Points
113
Location
Cave Creek, Arizona
Website
www.terrylove.com
work

Good but a few questions.
1. Why didn't you solder the tubing directly into the valve instead of using female adapters which can cause problems, although in your case they seem not to have?
2. Where is the tub valve in the picture of the enclosure wall?
3. Remember to reverse the cartridge in the tub or shower. Whichever is connected backwards.
 

JohnD

New Member
Messages
32
Reaction score
0
Points
0
Location
New York
Is your tub a Sterling Ensemble? It is a nice tub, it is deeper than many bathtubs @ 18", when I installed mine I found that many of the drain kits were to short. I used a push stop drain with pvc fittings, so I could compensate for the extra depth.

Looks like you are doing a nice job, and taking your time.:)
 

Mmarceau

New Member
Messages
11
Reaction score
0
Points
0
I'm installing this same tub/surround. actually i think i am going to install the jetted version b/c it isn't that much more expensive. i'm still in the process of removing the old cracked tub. long messy process. when installing this was there anything that caught you off guard or anything that didn't seem to fit right? i've never replaced a tub before so this is a new procedure for me.

any tips or checklists when installing? thanks.
 

Jadnashua

Retired Defense Industry Engineer xxx
Messages
32,770
Reaction score
1,190
Points
113
Location
New England
Can't tell exactly what that greenboard is on. Hopefully not in a shower or tub area, although probably okay behind the walls of the surround. Greenboard is no longer in the national codes, but may still be there in local ones. It is basically been found to be useless. No better than regular drywall when drywall is acceptable, and much worse than cbu, where wet areas are involved. On a ceiling, it is supposed to be supported at 12" spacing, but on a wall, 16" is okay.
 

scri8e

New Member
Messages
17
Reaction score
0
Points
0
Location
Long Beach, CA
Nice job! I'm green(board) with envy at not having a window in the back 60" wall to deal with like I do.
 
Top
Hey, wait a minute.

This is awkward, but...

It looks like you're using an ad blocker. We get it, but (1) terrylove.com can't live without ads, and (2) ad blockers can cause issues with videos and comments. If you'd like to support the site, please allow ads.

If any particular ad is your REASON for blocking ads, please let us know. We might be able to do something about it. Thanks.
I've Disabled AdBlock    No Thanks