Thanks LLigetfa.
If you're sure that the problem is not the result of any old silicone caulk interfering with the adhesion of the new silicone caulk, then I'm thinking your best bet is to use an acrylic, that is, a "latex" caulk instead, and just clean the mildew off of it periodically. Cleaning the mildew off silicone caulk is covered in "Part 4" of the following post, and I'd follow the same procedure to clean latex caulk as silicone caulk. (Maybe test in an inconspicuous area first to ensure it doesn't cause any unanticipated problems.)
Recaulking bathtubs and showers with silicone caulk is probably the one thing I've found on these DIY Q&A forums that perplexes more newbie homeowners than any other project.
That's because people don't realize that silicone caulk sticks particularily well to smooth surfaces like the enameled surface of a steel tub, or the glazed surface of ceramic wall tiles, and can be hard to remove if you don't know how to do it. And the problems start with not removing the old silicone caulk completely since NOTHING sticks well to cured silicone caulk, not even new silicone caulk. Unless you remove the old silicone caulk completely, then there will be a very thin film of silicone caulk remaining on the surface which will prevent your new silicone caulk from sticking well.
I own a small apartment block and I have 21 bathtubs, all of which have silicone caulking around them, and so it's important to my business to be able to maintain that caulk so that it remains clean and attractive for prospective tenants. This post was written to help newbies overcome most, if not all, of the difficulties they typically encounter working with silicone caulk.
This post is in 4 parts:
1. How to remove old Silicone caulk COMPLETELY.
2. What silicone caulk to buy
3. How to place new silicone caulk
4. How to clean mildewed silicone caulk
Part 1. How to remove old silicone caulk:
The way to do this is to first remove as much as you can by mechanical means. This means scraping as much as you can off with a razor, or if you have a fiberglass or acrylic bathtub that may be damaged by a sharp steel razor, use the plastic razor blades and scrapers available at Lee Valley or a plastic windshield scraper or any other reasonably sharp but relatively soft material that won't damage your fiberglass or acrylic surfaces. I actually find that stainless steel painting "spatulas" sold at art supply stores for spreading paste type paints on canvas are quite effective at removing silicone caulk. That's because their very thin blades can actually cut through relatively soft material like silicone caulk quite well, but I don't know if they would scratch acrylic or fiberglass. But, the first step is to remove as much of the silicone caulk as you can by conventional mechanical means like cutting, shaving and scraping.
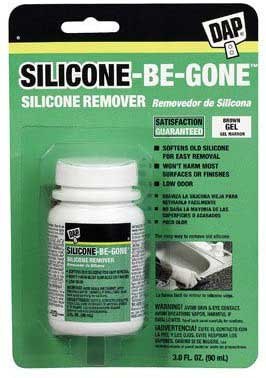
Next, apply a product called "Silicone-Be-Gone" which is made by DAP. You should find it in the caulking aisle of your local home center. Silicone-Be-Gone is nothing more than gelled mineral spirits. If you can't locate Silicone-Be-Gone in your area, just buy some mineral spirits (or paint thinner or "solvent" or Varsol, all the same stuff being sold under different names), get some strips of paper towel wet with the stuff, drape those strips over what's left of the silicone caulk and cover with amy cling Wrap film for an hour or two to prevent the paper towel strips from drying out. Alternatively, you can also cover the paper towel strips with wide (2 inch) painter's masking tape. The important thing is to have the mineral spirits in contact with the cured silicone and preventing the mineral spirits from evaporating during the several hours it's on.
Here's a photo of what "Silicone-Be-Gone" from Dap looks like:
Neither Silicone-Be-Gone nor mineral spirits will "dissolve" cured silicone, it will just make the silicone swell up and get much softer so that it can be more easily removed by mechanical means. After letting the Silicone-Be-Gone (or mineral spirits) work for an hour or two, scrape the silicone caulk a second time with a steel or plastic razor and you should find that you're removing considerably more of it. (You will see it accumulate on your razor blade or scraper). Apply more Silicone-Be-Gone and spread it with your finger this time so that the warmth softens the gel and you apply a thin, but even coat of Silicone-Be-Gone over the remaining caulk.
After leaving that Silicone-Be-Gone sit for another hour or two, scrub the area with a green or white Scotchbrite pad (like the kind sold in grocery stores for scouring pots). The difference between the green and white pads is that the green pads have a very fine abrasive impregnated into the plastic fibers the pad is made of whereas the white ones are made from just straight nylon fiber which doesn't contain any abrasives. I use the green pads on my enamel steel bathtubs, but I'd probably use a white pad on fiberglass or acrylic tubs so as not to dull their glossy surfaces.
After scrubbing with the Scotchbrite pad, clean the Silicone-Be-Gone off with clean water and dry with a cloth or paper towel. If you're using mineral spirits instead of Silicone-Be-Gone, then just wipe the area down with several paper towels and give the residual mineral spirits a few minutes to evaporate. There should be very little silicone left, but any that remains will prevent the new silicone caulk from sticking at that spot, so we need a way to confirm that there is ABSOLUTLEY NO residual silicone caulk remaining.
Remember that mineral spirits and Silicone-Be-Gone makes the silicone caulk swell up and get soft. Get a small quantity (a photographic film container full is plenty for one bathtub) of a very fine powder (like Portland Cement, cement based floor leveler, powdered drywall joint compound, or probably even ordinary baking flour would work). Use a small brush to apply that fine powder to the area where the silicone caulk was, and then wipe the powder over the area with your finger.
If there is any residual silicone caulk remaining, it'll still be soft and swollen and the fine powder will become embedded in it's surface, thereby revealing it's location by the difference in colour between power and tub or powder and tile. If there is no residual silicone caulk for the powder to become embedded in, the powder will be wiped cleanly off the tub by your finger.
Now, just apply more Silicone-Be-Gone to those areas where the powder became embedded in the residual silicone caulk. You should find that the residual silicone caulk is so soft now that it can be removed even by scraping the surface with the side edge of a small slot type screw driver, or with a small dental pick. Then, check those areas again with the fine powder to see if there's any remaining silicone.
Once the powder doesn't stick anywhere, clean the area to get rid of any powder and let the area dry. The next step is to start putting the new caulk on.
(For those who don't know, mineral spirits will evaporate completely without leaving a residue that needs to be cleaned off. So, if you use mineral spirits instead of Silicone-Be-Gone, you don't need to worry about any residue from the mineral spirits interfering with the adhesion of your new silicone.)
Part 2. What Silicone caulk to buy:
I think every company's "Kitchen & Bath" silicone caulk is about equal, but the reason I prefer to buy Dow Corning's "786" silicone caulk or DAP's (Dow's consumer products division) "Titanium II" silicone caulk is that they both come in the same truly RESEALABLE tube. Take a look at the nozzle on this tube of Dow 786 silicone caulk:

There is a cap at the top which pops off the nozzle, and the nozzle unscrews from the tube. You cut the nozzle at the desired spot to dispense a little or a lot of caulk, puncture the seal on the end of the tube, screw the nozzle into the end of the tube, stick the tube in your caulking gun and you're ready to caulk. When you're finished caulking, unscrew the nozzle from the tube, you slip a tiny screw style hose clamp over the internally threaded end of the tube, screw the cap that came off that nozzle into the tube finger tight, then tighten the hose clamp so it's snug, and finally turn the cap an additional 1/8 to 1/4 of a turn with a pair of pliers. That way, the hose clamp supports the end of the tube and prevents it from splitting cuz both the cap and end of the tube have TAPERED threads (just like threaded plumbing connections) so that the cap will get tighter and tighter the further you screw it into the tube (until the tube end splits). By having that small hose clamp on the end of the tube, you can ensure a tight seal and at the same time prevent the tube from splitting. Now clean the silicone caulk out of the nozzle so that you can re-use it.
When you need to use silicone caulk again, just unscrew the threaded cap from the tube, screw your nozzle back in, put the tube in your caulking gun and you're ready to go again. (Also, for those that don't know, there are different ways in which silicone rubbers cure, but they all react with water vapour in the air to cure. So, if feasible, store your partially used silicone tubes in your freezer. The humidity in really cold air is so low that lack of airborne moisture helps prevent any opened tubes of silicone caulk from curing at the opened end.
So, the reason I preferlike Dow Corning 786 silicone caulk isn't because I think the caulk is any better, it's because the tube has a method of resealing that can be made to work very well. However, in the last section of this post, you'll find out how to clean mildew off of silicone caulk, so you can keep any silicone caulk looking clean for decades.
Part 3. How to place the new silicone caulk:
Use masking tape (1/2 or 3/4 inch wide) to mask off the joint you're wanting to caulk. Use 3/4 or even 1 inch wide masking tape if you have little experience caulking. Put the edge of the tape about 1/4 inch away from the corner on both sides of the joint you wanna caulk. So, you also need to stop taping about 1/4 inch before any vertical joints you also want to caulk as well. I find a handy tool for taping can be made by gripping a single edge razor blade in a pair of needle nose style locking pliers. Put the tape in place and then put the edge of the razor firmly on the masking tape where you want to cut it, and then pull the tape at an angle so that it tears off at the razor's sharp edge. Using this tool will allow you to put your tape on more quickly and more accurately. Also, if you have a piece of 1/4 inch thick plywood, or something like that, you can simply pull some tape off your roll and then use the plywood as a gauge to hold the roll at the correct distance from the wall or the tub as you press the tape down into place.
(If you do a lot of caulking, you can probably just caulk the tub freehand without even bothering with masking tape, but I'm writing this up for new homeowners who want to get a good looking job without having to rely on years of caulking experience they don't have.)
Before putting the new silicone in place, press down the edges of the masking tape so that you're sure that the new silicone won't get under it.
Squeeze out the new caulk onto the joint and wipe it down with a dry finger so that it's relatively uniform in thickness over the area you want caulked. Don't let so much caulk accumulate on your finger that it starts getting on the tub or tile on the OTHER side of the masking tape. At this stage, you simply want a relatively uniform amount of caulk all along the joint(s), and how you accomplish that really doesn't matter.
Once you've got the new silicone caulk reasonably uniformly distributed along the joint, wipe your finger clean and pull the masking tape off. Now, give the new silicone caulk a few minutes to "skin over". This is a good time to mix up a 50/50 solution of liquid dish washing detergent and water which you'll need for the next step.
Now, "tool" your new silicone caulk by dipping the fingers of your working hand into that soapy solution, and wiping the new silicone down using your soapy index finger. The soap solution on your finger will act as a lubricant and prevent the silicone from sticking to your finger. After each wipe of 6 to 8 inches, rub your finger tips together to reload your index finger with more soap solution, and wipe down another 6 to 8 inches. As you do this, soap will come off your finger and coat the uncured silicon caulk. After you do the whole joint, you can then run your finger from one end of the tub to the other because of the soap solution remaining on the surface of the caulk. Once you find that you can do that, you can also use your soapy finger to move caulk in one direction or the other to get a more uniform looking bead of silicone caulk.
Also, at this point, if you wipe the silicone too hard and remove it from one area, you can simply add a little more caulk to that area and spread it as best you can with a soapy finger. I can't explain why it sticks with the soap solution on the existing caulk, but it does. If you put on too much, scrape off the excess with the same tool you used for cutting the masking tape.
Allow the silicone caulk to cure overnight and you can shower the next day. Don't put any shampoo bottles near it for the first 2 or 3 days so as to avoid messing it up accidentally.
Part 4. How to clean mildewed silicone:
Mix up Borax powder (which you can buy in the laundry detergent aisle of your local supermarket) with bleach straight out of the jug to make a paste that you can spread with a spoon (even a plastic tea spoon) onto the old mildewed silicone. (I use a small oval painting spatula that you can buy in art supply stores to spread the Borax/Beach paste.) I mix up the paste with a chop-stick in a tin can and when it's fairly thick (so that it doesn't slump too much under it's own weight) and uniformly mixed, I use a large soup spoon to hold the bleach paste close to the mildewed silicone caulk I want to clean, and use the oval painting spatula (or small tea spoon) to both scoop the bleach paste onto the mildewed caulk and spread it smoothly over the caulk. (Maybe use a plastic tea spoon to avoid marking the tub or tile.)
Once your bleach paste is spread over the mildewed silicone, cover the wet bleach paste with any cling Wrap (including Saran Wrap) that will stick to tub and tile to prevent the paste from drying out. You'll find that most of the cleaning will occur within the first 24 hours, but I like to leave the bleach paste and cling Wrap on as long as possible since it won't hurt either an enameled steel bath tub or glazed ceramic wall tiles. I do this kind of work often (generally after every tenant vacates), and so instead of using cling wrap, I buy a wide gummy tape called "Premask" from a local tape manufacturer. It's more expensive, but it's easier to work with than cling wrap cuz cling wrap has a habit of sticking to itself and thereby making it harder to work with. But, I used cling wrap for years prior to switching to Premask tape, and both work equally well. You could also use 2 inch wide painter's masking tape, and then put 2 inch wide packaging tape over the painter's masking tape to ensure no bleach evaporates.
When you pull the cling Wrap off and remove the bleach paste the next day (or better, several days later) your silicone caulk will be white as Manitoba snow. And, you can do this repeatedly to the same caulk over and over again to maintain it in a mildew free condition indefinitely.
Now, you don't need to use Borax to make your paste. Any powder that will mix with bleach to make a paste will do since it's really the bleach that kills the mildew, thereby cleaning the silicone caulk. However, I find that Borax works best. Firstly, some powders like baking soda are heavier than the bleach, and tend to gravity segregate in the mixing container so that you need to keep mixing it to prevent the liquid from rising and the powder from settling. Borax is much closer to the density of bleach, so the rate of separation is much slower, so each mixing lasts longer. Also, when you mix bleach with borax, the resulting paste is kinda sticky, and that allows you to apply it to vertical joints and even the UNDERSIDE of soap dishes and have it stay in place (with the help of some cling wrap or masking tape). Using other powders like baking soda and talcum powder won't give you that stickiness.
Aside: I've also tried using Vim Thick Bleach (made by Unilever Canada 1-800-896-9286) to make pastes for cleaning silicone caulk, and it just doesn't work. That's because the concentration of the active ingredient, sodium hypochlorite (NaOCl) in VIM Thick Bleach is only 3.5 percent compared to 6.25 percent for Chlorox or Javex, and if you mix some powders into VIM Thick Bleach, the gelled bleach immediately breaks down into a runny liquid instead of remaining thick so that it sticks to vertical surfaces well. Also, be aware that No Name and house brand bleaches will often only have a 5 percent concentration of NaOCl in them, so buy Javex or Chlorox to get the full 6.25 percent NaOCl for more effective cleaning.
Finally, you really can't save the old paste and reuse it. That's because the bleach you've mixed with Borax (or any powder) will lose it's potency quite quickly, and your paste will thin out very quickly as soon as you mix a little bleach into it. So, chuck the old bleach paste after using it and mix up new beach paste for each cleaning.
Hope this helps.