rhoyerjr
New Member
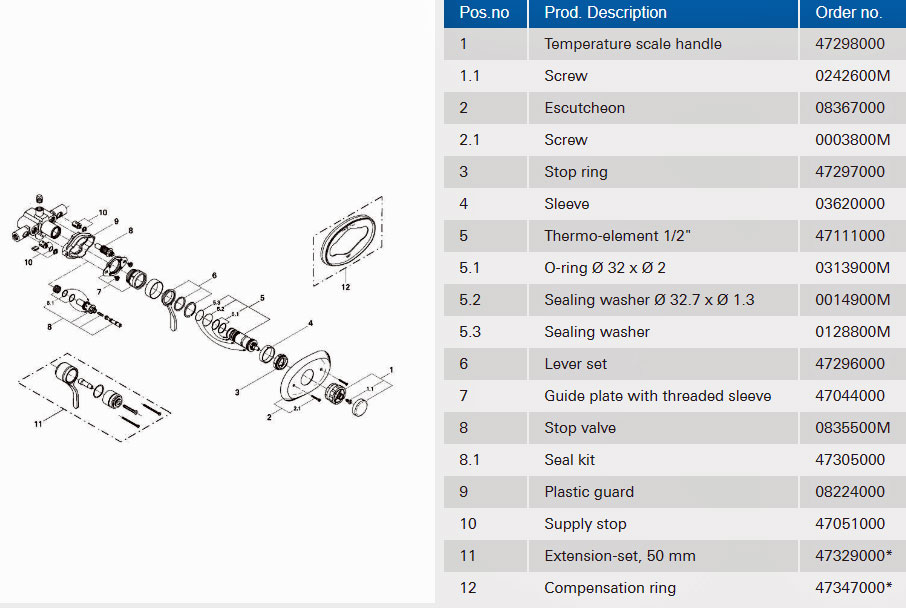
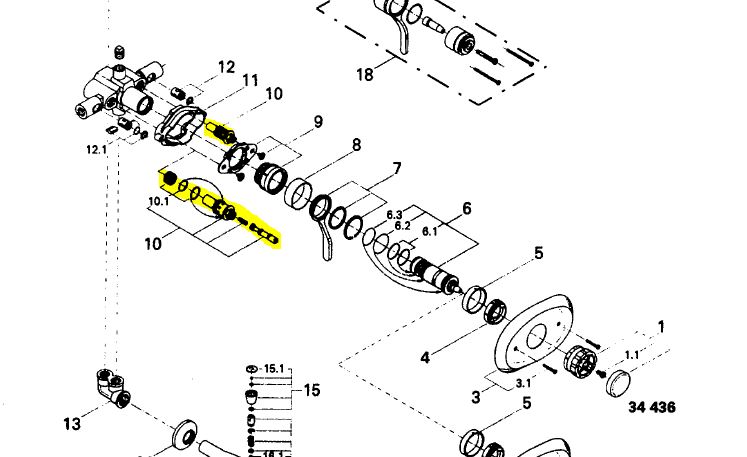
Leaking Grohe model 34-436.
I purchased and installed part 47-111, (thermo element cartridge ($165.00)) based on my local plumbing store recommendation that this should fix a very consistent drip from my Grohe shower faucet. My local plumbing store is normally very reliable but I do not think they know Grohe faucets very well so I am turning to this forum for advice.
While I had the facet disassembled I cleaned and lubricated everything.
I believe my problem may be one of the stop valves. Both of them had some green corrosion which I cleaned off. I also lubricated the o rings. Before I spend any more money and take the time to tear apart the faucet again does anyone have any experience and advice? Perhaps I am missing an adjustment that would stop the leak?
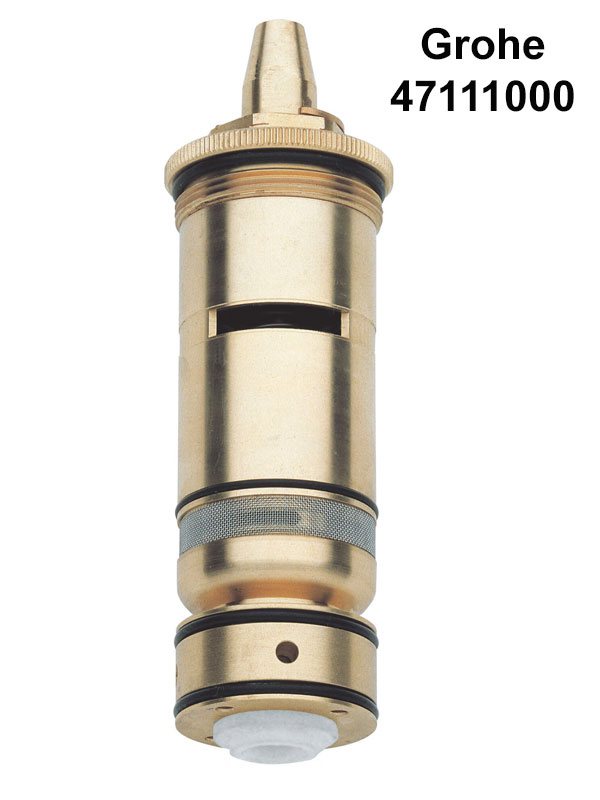
Last edited by a moderator:
") Replacing the stop valves stopped the leak.
Replacing the stop valves stopped the leak.